 clipoven
You’ve finished a vlog, exported it carefully, and uploaded it as a Short. Then the preview appears: your subject is small, black bars dominate the screen, and the composition that looked balanced in your editor feels lost in a vertical feed. The problem usually isn’t the camera or the edit. It’s the YouTube video size ratio, the relationship between the shape of your video and the screen where people watch it.
The fix starts by separating two decisions creators often combine: aspect ratio determines the shape of the frame, while resolution determines how many pixels fill that frame. Once those decisions are clear, you can choose an export recipe for long-form videos, Shorts, or repurposed clips instead of guessing from a specification chart.
Table of Contents
- Why Your Export Shape Matters More Than You Think
- Aspect Ratio and Resolution Explained Simply
- The Main YouTube Shapes in 2026
- Export Settings for Standard YouTube Videos
- Choosing the Right Shape for Shorts and Cross-Platform Clips
- Reframing Horizontal Footage for Vertical Feeds
- Common Mistakes That Ruin YouTube Exports
- Your Pre-Upload Checklist and What’s Next for YouTube Sizing
Why Your Export Shape Matters More Than You Think
A creator can make every creative choice correctly and still lose the visual impact at upload. A horizontal vlog edited in 16:9 has a wide frame, designed for a conventional YouTube player. A Short uses a tall, mobile-first frame. Put the first shape inside the second without reframing, and YouTube has only imperfect choices: show the whole image with empty space, or enlarge and crop important parts.
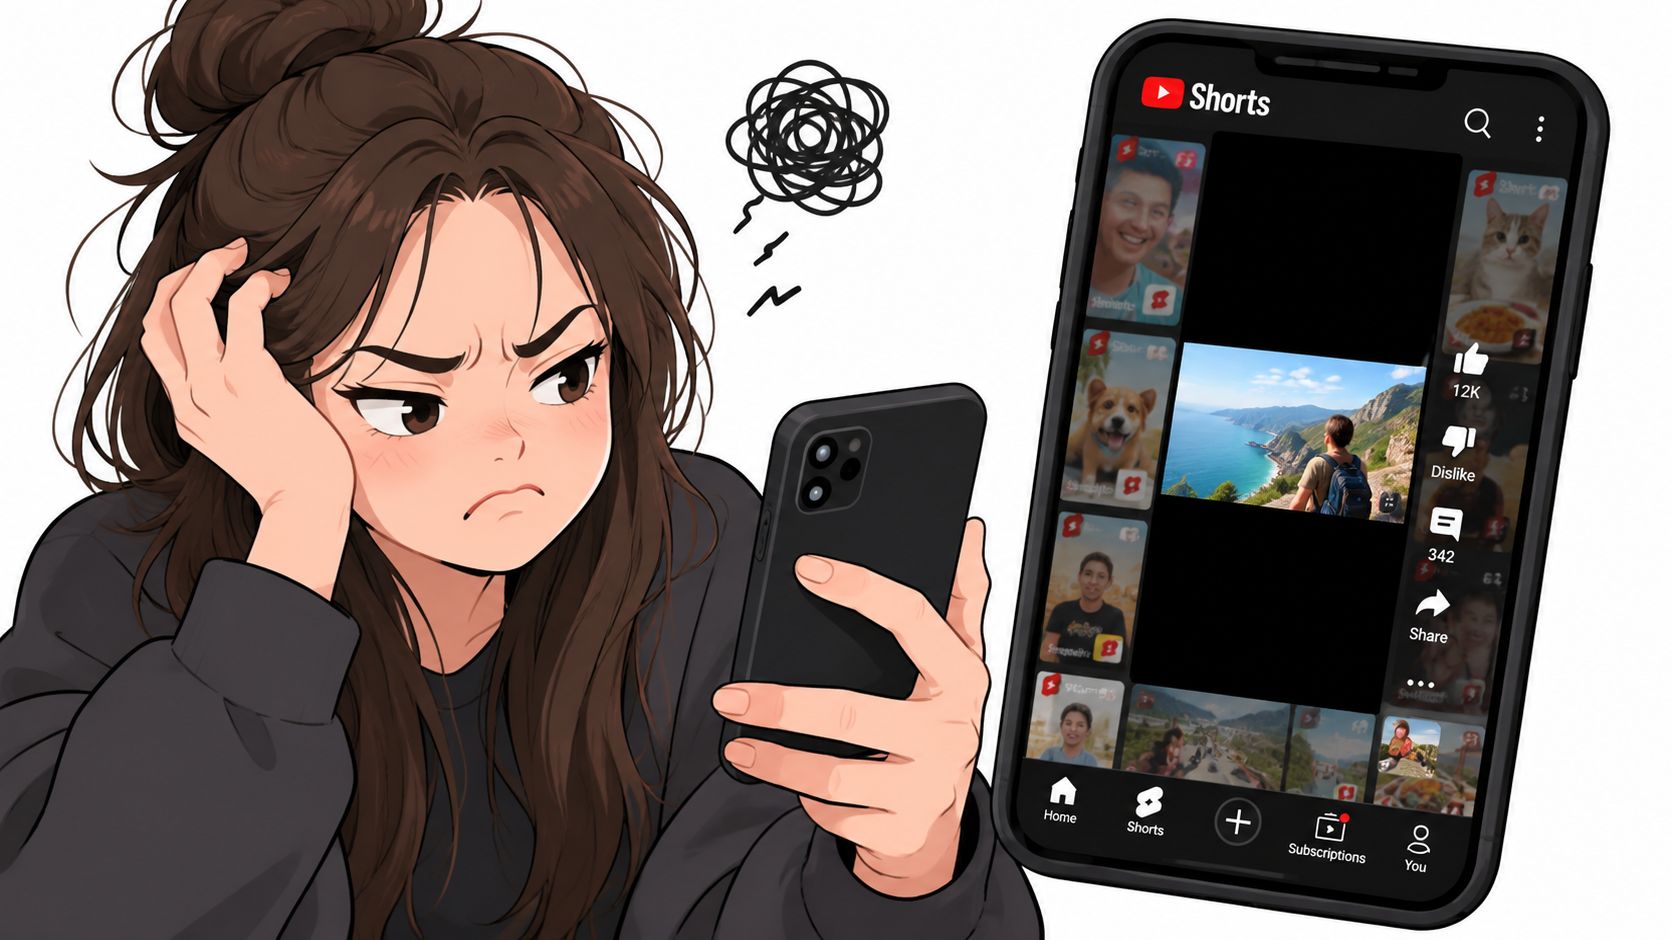
That creator’s black bars weren’t a mysterious algorithm penalty. They were the visible result of a mismatch between the source canvas and the viewing surface. YouTube’s standard computer playback ratio is 16:9, and its formatting guidance identifies 1.77:1 as the native ratio in its specifications, which is why widescreen remains the canonical baseline for traditional uploads (YouTube’s aspect ratio guidance).
The crop changes the story
A horizontal interview may place two people near opposite edges. A vertical crop can keep one speaker and cut away the other. A product demonstration may show the presenter’s hands, the item, and a title card across the full width. A Shorts crop may preserve only the center, turning a clear explanation into a close-up of someone’s shoulder.
Viewers also respond differently to wasted space. On a phone, a true vertical video can fill the feed. A letterboxed horizontal clip asks the viewer to accept a smaller picture or zoom manually. Zooming may remove captions, logos, or the action that made the clip worth watching.
Practical rule: Choose the destination shape before you arrange captions, facecam windows, graphics, and subjects.
The same footage can serve several platforms, but it usually needs several compositions. TikTok, Instagram Reels, and YouTube Shorts favor mobile-native vertical framing, while standard YouTube playback has long been built around widescreen viewing. Export is the final step, not the moment when the ratio should be decided.
Aspect Ratio and Resolution Explained Simply
Think of a video as a picture inside a frame. Aspect ratio is the frame’s shape, like choosing a horizontal print, a square print, or a vertical print. Resolution is the amount of detail inside that frame, similar to how densely the print is filled with fine threads.
A ratio compares width with height. A 16:9 frame is wide, while 9:16 is tall. The numbers don’t describe total size by themselves. They describe the relationship between the two sides. That’s why different files can share the same ratio while using different dimensions.
Read dimensions as width by height
Resolution is written as width × height in pixels. Pixels are the tiny picture elements that form each frame. A file measuring 1920×1080 and another measuring 3840×2160 both use 16:9, but the second contains more pixels and can preserve more detail when the source, edit, bitrate, and playback conditions support it.
A vertical file measuring 1080×1920 also contains the same two dimension values, but in the opposite orientation. It isn’t a vertical version of 1920×1080 merely because both are described casually as “1080p.” The canvas has changed from wide to tall.
You can calculate a ratio by simplifying the width and height relationship. For example, 1920 divided by 1080 reduces to 16 divided by 9. The exact pixel dimensions affect detail and file size, while the simplified relationship tells your editor and player how the image should be displayed.
Why the distinction matters
YouTube processes both the shape and the detail, but the shape determines the first visual experience. A high-resolution file in the wrong orientation can still leave a subject badly cropped or surrounded by unused space. A correctly shaped file with modest resolution can look more coherent because the composition fills the intended surface.
A useful export question is therefore two-part:
- What shape does the destination need?
- How much detail does this project justify inside that shape?
Answer the first question before choosing the second. Resolution can’t repair a badly composed frame.
The Main YouTube Shapes in 2026
The useful choices are easier to understand as destinations rather than rankings. 16:9 is the conventional long-form canvas. 9:16 is the native vertical choice for Shorts-style mobile distribution. Square and taller feed formats can be useful when one edit must travel across several surfaces, but they involve compromises.
| Aspect Ratio | Common Resolutions (WxH) | Primary Use | Notes |
|---|---|---|---|
| 16:9 | 1280×720, 1920×1080, 2560×1440, 3840×2160 | Standard YouTube videos | Best starting shape for tutorials, reviews, gaming videos, and conventional long-form playback |
| 9:16 | 1080×1920 | Shorts and mobile-native clips | Fills the vertical feed and requires subject-aware reframing from horizontal footage |
| 1:1 | 1080×1080 | Cross-platform square posts and some Shorts workflows | A compromise that preserves a centered subject but uses less mobile screen height than vertical |
| 4:5 | 1080×1350 | Taller social-feed posts | Useful for feed reuse, but it isn’t the same as a native 9:16 Shorts canvas |
Start with 16:9 for conventional uploads
A tripod tutorial, product review, gaming session, or interview usually begins at 16:9. The standard HD baseline is 1920×1080, while smaller HD output can use 1280×720. Higher-detail masters can use 2560×1440 or 3840×2160 when the original footage and workflow justify them.
YouTube’s own documentation says creators should upload video in its native aspect ratio and avoid adding letterboxing or pillarboxing bars to the file (YouTube’s upload formatting recommendations). That means you generally shouldn’t place a vertical video inside a fake widescreen canvas just to make the dimensions look familiar.
Use 9:16 when the feed is the destination
A 1080×1920 export gives a vertical clip the tall canvas expected by mobile-first viewing. It’s a strong starting recipe for a talking head, a gameplay highlight cropped around a key action, or a podcast excerpt rebuilt around one speaker.
A horizontal source can still become a useful Short, but it needs a new composition. If the source was designed around several subjects spread across the frame, automatic cropping may make the result feel accidental.
Treat 1:1 and 4:5 as deliberate compromises
A 1080×1080 square keeps a centered presenter visible and can travel neatly to feed-oriented destinations. It won’t occupy as much vertical space as 9:16, but it may be easier to reuse without rebuilding every title and graphic.
A 1080×1350 4:5 frame is taller than square and can work for social-feed reuse. It should be selected because the distribution plan needs it, not because it sounds like a universal YouTube setting. When classification or native Shorts presentation is the priority, follow YouTube’s current guidance rather than assuming every tall shape behaves identically.
YouTube’s guidance on longer Shorts adds an important complication: uploads wider than 16:9 can be treated as long-form, while current third-party explanations discuss square and vertical clips of up to 3 minutes as possible Shorts formats (YouTube’s longer Shorts FAQ). Check the current upload behavior for your account and destination before standardizing a production template.
Export Settings for Standard YouTube Videos
For a normal widescreen upload, keep the project and export at 16:9. A reliable general-purpose file is an MP4 container with H.264 video and AAC audio, because those settings are broadly compatible with editing and playback tools.
Match the frame rate to the source rather than changing it casually. Common source rates include 24, 30, and 60 frames per second, but the correct choice depends on how the footage was recorded. Converting a source unnecessarily can create duplicated frames, uneven motion, or a less natural feel.
A practical resolution ladder
The table below uses the resolution tiers and bitrate guidance provided in YouTube’s official upload recommendations. Treat the bitrate as an export target, not a guarantee of final appearance. YouTube re-encodes uploaded files, so source quality, motion, texture, and compression all influence the result.
| Resolution | Dimensions | Recommended Bitrate | Codec | Notes |
|---|---|---|---|---|
| 720p | 1280×720 | Use YouTube’s recommended range for your frame rate | H.264, H.265, or AV1 | Suitable when the source is HD or bandwidth is a concern |
| 1080p | 1920×1080 | Use YouTube’s recommended range for your frame rate | H.264, H.265, or AV1 | A practical baseline for most standard videos |
| 1440p | 2560×1440 | Use YouTube’s recommended range for your frame rate | H.264, H.265, or AV1 | Useful when the source contains fine detail |
| 2160p | 3840×2160 | Use YouTube’s recommended range for your frame rate | H.264, H.265, or AV1 | Appropriate for genuine 4K projects and large-screen viewing |
The available upload limit is 256 GB or 12 hours, whichever is smaller, according to YouTube’s official upload limits. That limit is not a reason to export enormous files by default. A clean master at the appropriate resolution is easier to upload, inspect, archive, and replace.
Avoid the false widescreen canvas
A 1080×1920 vertical file isn’t a sensible standard-video export because it has “1080” in its name. In a widescreen player, the video may appear with side space or a reduced active picture. If the project is meant for the main long-form player, build the timeline at 16:9 from the beginning.
Before uploading, open the rendered file in VLC or another local player. Check that the frame fills the intended canvas, captions stay inside the picture, voices are present, and motion looks consistent. Scrub through the first minute and a busy section, then test the file on a phone as well as a larger display.
Choosing the Right Shape for Shorts and Cross-Platform Clips
Shorts shape selection is less about a single rule and more about the job the clip must perform. 9:16 gives a mobile feed the frame it was designed to display. 1:1 can be a workable compromise for a centered subject and cross-posting. 16:9 can survive as a repurposed cut only when the important material already sits safely near the center.
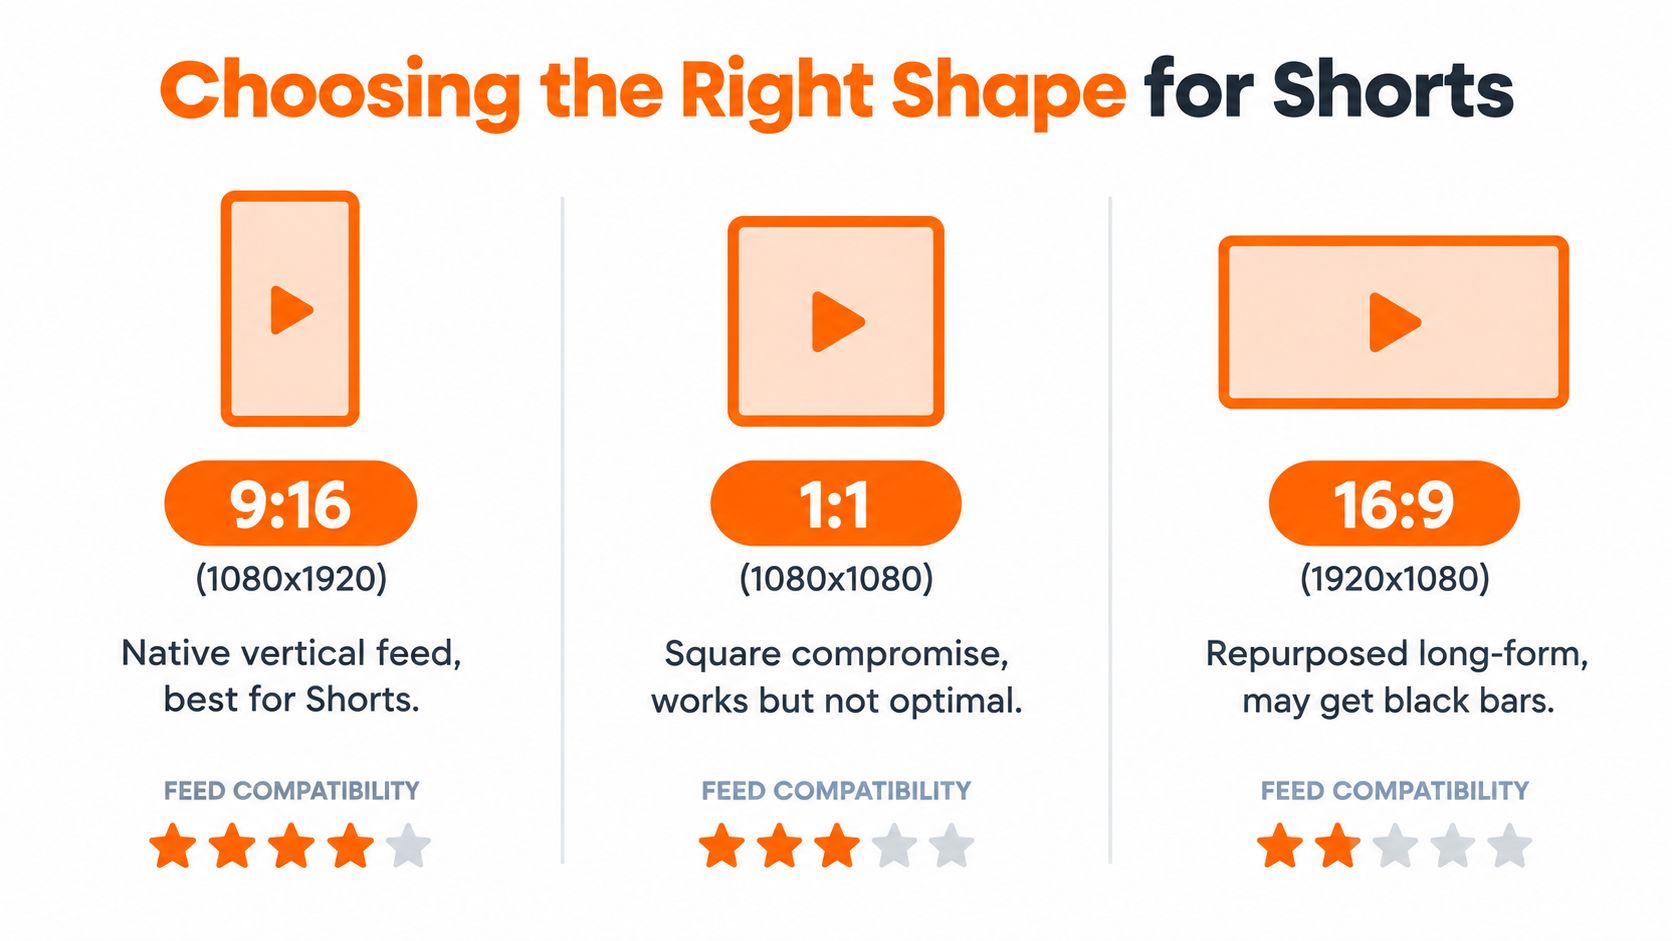
| Shape | Phone screen use | Cross-platform flexibility | Framing tolerance |
|---|---|---|---|
| 9:16 | Highest for a vertical feed | Strong for TikTok and Reels-style destinations | Requires careful treatment of captions, overlays, and moving subjects |
| 1:1 | Moderate | Strong for square feed posts | More forgiving for centered faces and simple graphics |
| 16:9 | Lowest inside a vertical feed | Best for the original long-form version | Least forgiving unless the source was edited around a center-safe crop |
Pick 9:16 for a native Short
The practical starting point is 1080×1920 at 9:16, because it fills the mobile surface and gives you room to design readable captions above and below the speaker. It also makes the clip easier to reuse in other vertical-feed environments.
A vertical layout still needs breathing room. A face placed too close to the top can conflict with interface elements. Captions placed too low can compete with buttons or descriptions. Keep the composition readable without assuming the viewer will rotate the phone or zoom.
Choose square when reuse outweighs immersion
A 1080×1080 file can suit a clip that must appear in several square feed placements. It’s particularly practical for a single centered speaker, a close product shot, or a graphic-led explanation where the composition doesn’t depend on the full height of a phone.
The trade-off is visible immediately. A square file doesn’t occupy the same vertical area as a native portrait file, so it may feel less immersive in a scroll-first feed. In return, the crop can be less disruptive when the same master also needs to work in a conventional social feed.
Keep 16:9 only when the crop is already safe
A horizontal clip isn’t automatically unusable as a Short. It becomes risky when the speaker, subtitle, or action sits near an edge. If the edit was created with a tight central composition, you may be able to crop it later. Otherwise, rebuild the framing rather than expecting YouTube to preserve every part of the original.
The rules around Shorts formats have become more flexible, including guidance for longer Shorts and non-9:16 uploads. Because those rules can change, treat 9:16 as the safest native choice, not as a claim that every other shape is rejected.
Reframing Horizontal Footage for Vertical Feeds
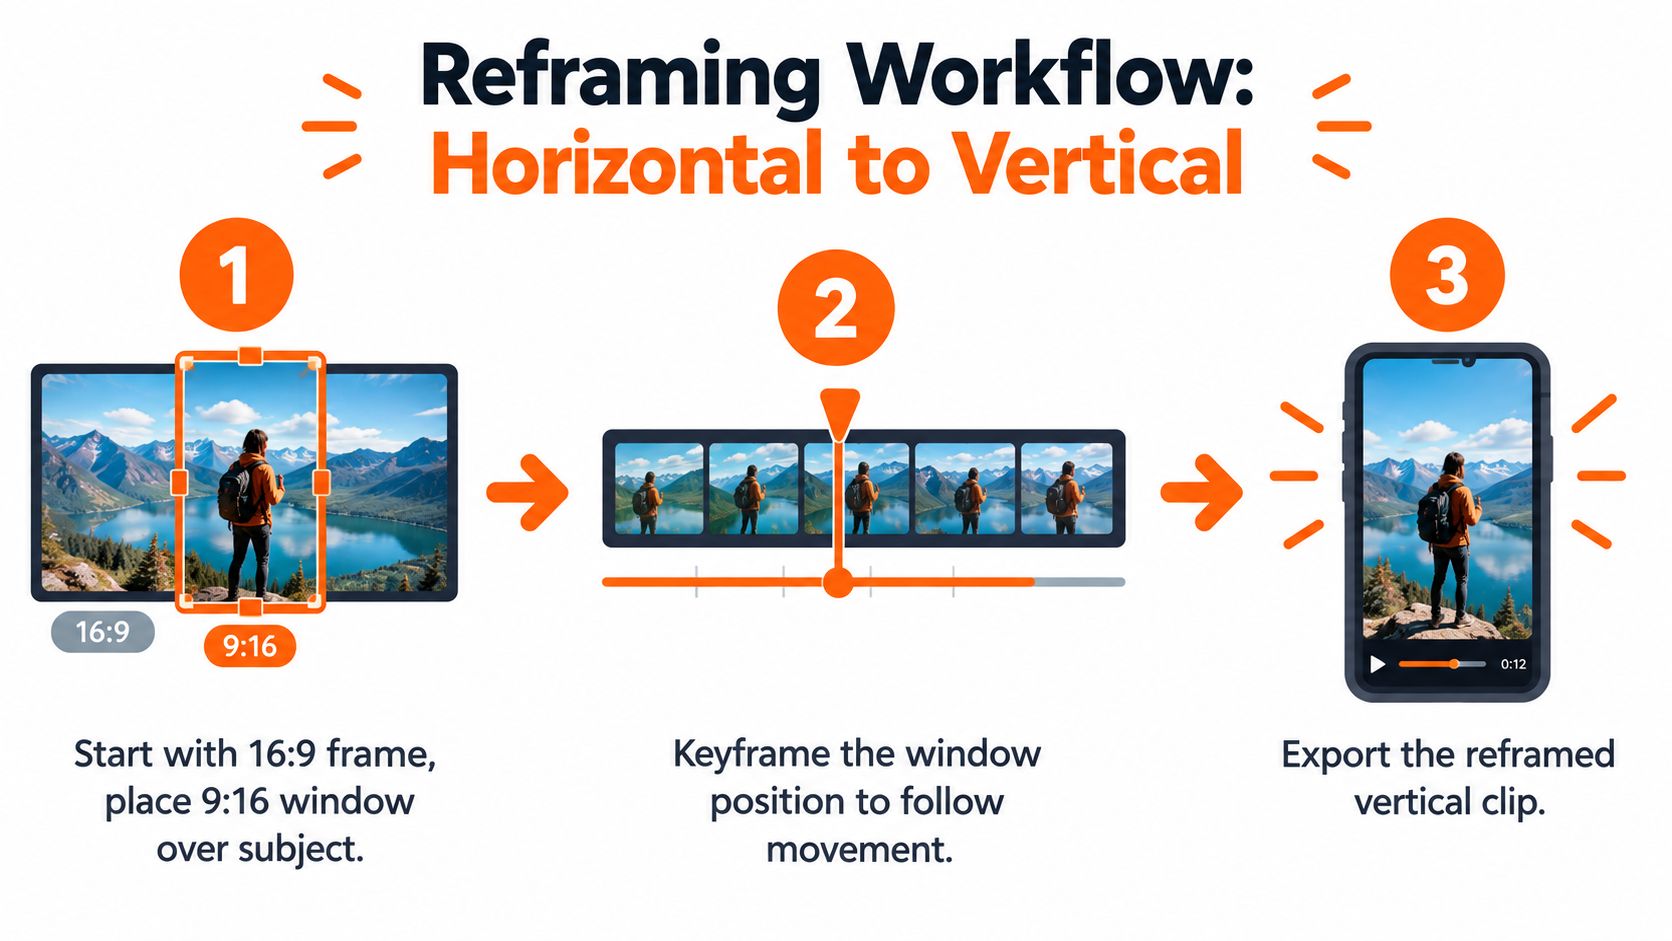
A 16:9 frame can contain a 9:16 window, but the window is much narrower. Think of it as sliding a portrait-shaped cutout across a horizontal photograph. At one moment the cutout follows the host, and at another it follows the product or gameplay action.
Build the crop around the hero subject
Start by identifying the person, object, or action the viewer must see. Then create a vertical sequence and place that subject inside the active frame. Adobe Premiere Pro’s Auto Reframe, DaVinci Resolve’s Smart Reframe, and CapCut’s AI tracking can provide a first pass, but the editor still needs to inspect every important cut.
Keep important material away from the edges. A title near the top, a face at the extreme side, or a subtitle touching the bottom can become unreadable once platform controls and safe-area differences enter the picture. A generous central composition is usually more reliable than a crop that barely contains the subject.
Use keyframes where the story moves
A dependable workflow looks like this:
- Find the subject. Decide whether the frame follows a speaker, a player, a product, or a moving event.
- Mark scene changes. Add position keyframes at cuts and whenever the subject changes direction.
- Track with margin. Don’t pin the crop tightly to a face. Leave room for natural movement.
- Render a vertical proxy. Use 1080×1920 to review the composition before a final export.
- Watch on a phone. Check the clip in bright light, with captions enabled, and without relying on your editing monitor’s large preview.
A two-person wide shot often needs a different edit, not a more aggressive crop.
Manual keyframing takes longer, but it can preserve the point of a scene when automated tracking chooses the wrong face or reacts to background movement. For future shoots, leave more room around the subject and capture close alternatives. Reframing is much easier when the original coverage anticipates vertical reuse.
The embedded demonstration can help you compare the sliding-window idea with your own editor:
Common Mistakes That Ruin YouTube Exports
Export myths persist because different problems look similar in the player. Black bars, softness, a bad crop, and a low-quality encode may all be described as “the size is wrong,” even though each has a different cause.
| Myth | What People Believe | What Actually Happens |
|---|---|---|
| Black bars are always bad | Every border means the export failed | Bars can preserve the full image, but they also reduce active picture area and may signal a shape mismatch |
| 4K is always sharper | More pixels automatically fix any soft video | Higher resolution can’t restore detail that wasn’t captured, and larger files can take longer to upload and process |
| Shorts must be 9:16 | Every other shape is excluded | YouTube’s evolving guidance and current explainers allow more flexibility, but 9:16 remains the most native choice |
Myth one is about intent
A letterboxed cinematic composition may be deliberate when the bars are part of the visual design. A vertical clip padded inside a widescreen canvas is different. It reserves pixels for borders instead of picture information, even though the source itself could have been presented as a true vertical frame.
YouTube advises uploading in the native aspect ratio without adding letterboxing or pillarboxing bars. The practical question is whether the borders belong to the artwork or merely hide an export mismatch.
Myth two confuses source quality with output size
A 4K export can preserve more detail when the original recording contains that detail and the production pipeline supports it. It won’t turn a soft, noisy, poorly focused source into a crisp image. Larger files also demand more storage and patience, so small creators should choose the resolution that matches the project rather than treating the highest option as automatic insurance.
Myth three ignores evolving format rules
Current Shorts guidance is broader than the old “vertical only” shorthand. Square and other nonstandard shapes may appear in eligible workflows, but acceptance doesn’t make every ratio equally effective. A square crop may preserve a centered face, while a horizontal crop may waste mobile space or require heavy reframing.
Before rendering, inspect three less obvious details:
- Color management: Confirm that the exported color space matches the project and playback expectations.
- Audio headroom: Check peaks and listen for clipping, especially after music and voice are combined.
- Motion consistency: Match the frame rate to the source instead of forcing a higher rate that adds no real motion detail.
Your Pre-Upload Checklist and What’s Next for YouTube Sizing
A reliable export check should take less time than fixing a bad upload. Run through the destination, canvas, detail level, encoding, motion, and device preview in that order.
- Confirm the surface. Decide whether the file is for standard YouTube playback, Shorts, or cross-platform feeds.
- Confirm the ratio. Use 16:9 for conventional widescreen work, 9:16 for a native vertical Short, or a deliberate square or feed format when reuse requires it.
- Match dimensions to shape. A 16:9 timeline needs matching width and height proportions. A vertical project needs a true portrait canvas, not borders inside a standard horizontal file.
- Select the codec. H.264 is a dependable compatibility choice. H.265 or AV1 can reduce file size in workflows that support them.
- Set the bitrate for the chosen resolution. Don’t use a preset built for a different canvas or quality tier.
- Match the source frame rate. Then export a short sample and review it on a phone using mobile data before committing to the full render.
Keep the decision simple
If the content is a tutorial, review, interview, or gaming video intended for the regular player, start with 16:9 at 1920×1080. If it’s a feed-first clip, start with 9:16 at 1080×1920 and reframe the action manually when tracking makes a poor choice. If one centered clip must travel through square feed placements, consider 1:1 at 1080×1080, then verify how it appears on each destination.
Shorts sizing is still evolving. YouTube’s current guidance discusses longer Shorts and broader format behavior, so creators should revisit the platform’s documentation instead of relying on an old “9:16 only” rule. Treat future format ideas, such as additional preview shapes or broader reuse conventions, as possibilities to test rather than settled platform facts.
Bookmark the checklist, keep separate project presets for widescreen and vertical work, and review YouTube’s official guidance whenever you change your publishing workflow. The most useful preset is the one that matches the surface, protects the subject, and produces a clean native frame.
If you’re turning horizontal footage into Shorts, clipoven can automatically reformat it into vertical compositions with subject-focused reframing, AI-selected cuts, captions, and an editable timeline. Visit clipoven to turn your existing horizontal videos into polished vertical clips without rebuilding every crop by hand.