 clipoven
You know the clip. The edit is solid, the hook lands, and the comments still fill up with, “What did she say?” because the captions never got added. On TikTok, that’s not a small miss, it’s usually the point where a decent video loses the scroll.
Auto captions for TikTok have moved from a nice extra to basic packaging. TikTok introduced auto captions in April 2021, which mattered because short-form video lives in silent feeds, fast commutes, and sound-off viewing habits, and captions stopped being a manual accessibility add-on and became part of the workflow itself. In practice, that means the caption layer has four jobs now, enable, correct, style, and comply.
Table of Contents
- Why Auto Captions Have Become a Default on TikTok
- Turning On Auto Captions in the TikTok App
- Where Auto Captions Still Get Things Wrong
- Fixing and Editing Auto Captions the Right Way
- Styling Captions for Accessibility or for Retention
- When to Outsource Captions to an AI Editing Workflow
- A Repeatable Caption Workflow Before You Publish
Why Auto Captions Have Become a Default on TikTok
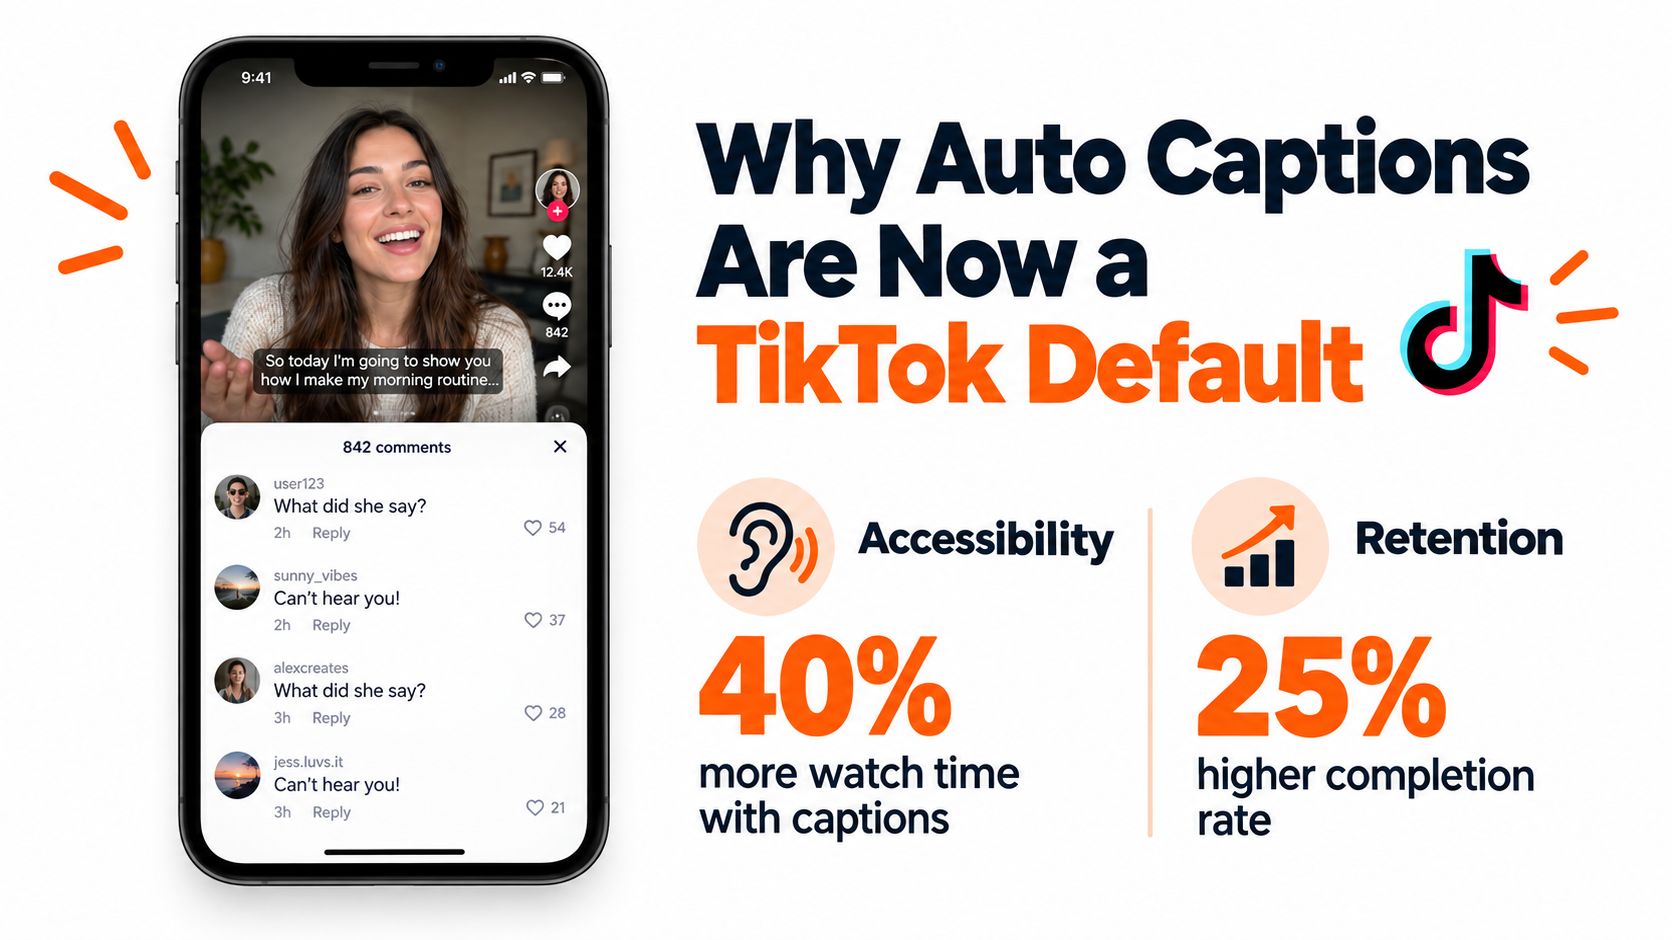
The moment usually happens in the comments, not in the editor. A creator posts a clip with strong retention, then the replies start stacking up with “can’t hear you” or “what did she say?” because the video made sense to the person who cut it, but not to everyone else watching on mute. That’s the gap captions close.
TikTok’s own move to launch auto captions in April 2021 was a platform-level acknowledgment that subtitles are no longer a post-production luxury. They’re built into how people consume vertical video now, especially when the format leans on quick cuts, overlays, meme audio, and compressed dialogue that can be hard to follow without text. TikTok has also been studied in accessibility research as a place where short clips can be difficult for blind and low-vision users to understand when the visual layer carries too much of the meaning, which makes the caption layer more than a convenience.
What auto captions actually give you
Auto captions are useful because they create a first-pass transcript and put text directly on the video without extra export steps. That saves time, but it also changes the job of the editor. You’re no longer deciding whether to caption at all, you’re deciding whether the generated text is accurate enough to publish.
Practical rule: If the caption layer changes comprehension, it needs a manual review. If it’s just decorative, you can be looser.
That’s the shift. A TikTok post now needs captions that can be turned on, corrected, styled for the feed, and kept readable for viewers who need accessibility support or just don’t want to blast audio in public. Auto captions are the starting point, not the finish line.
Turning On Auto Captions in the TikTok App
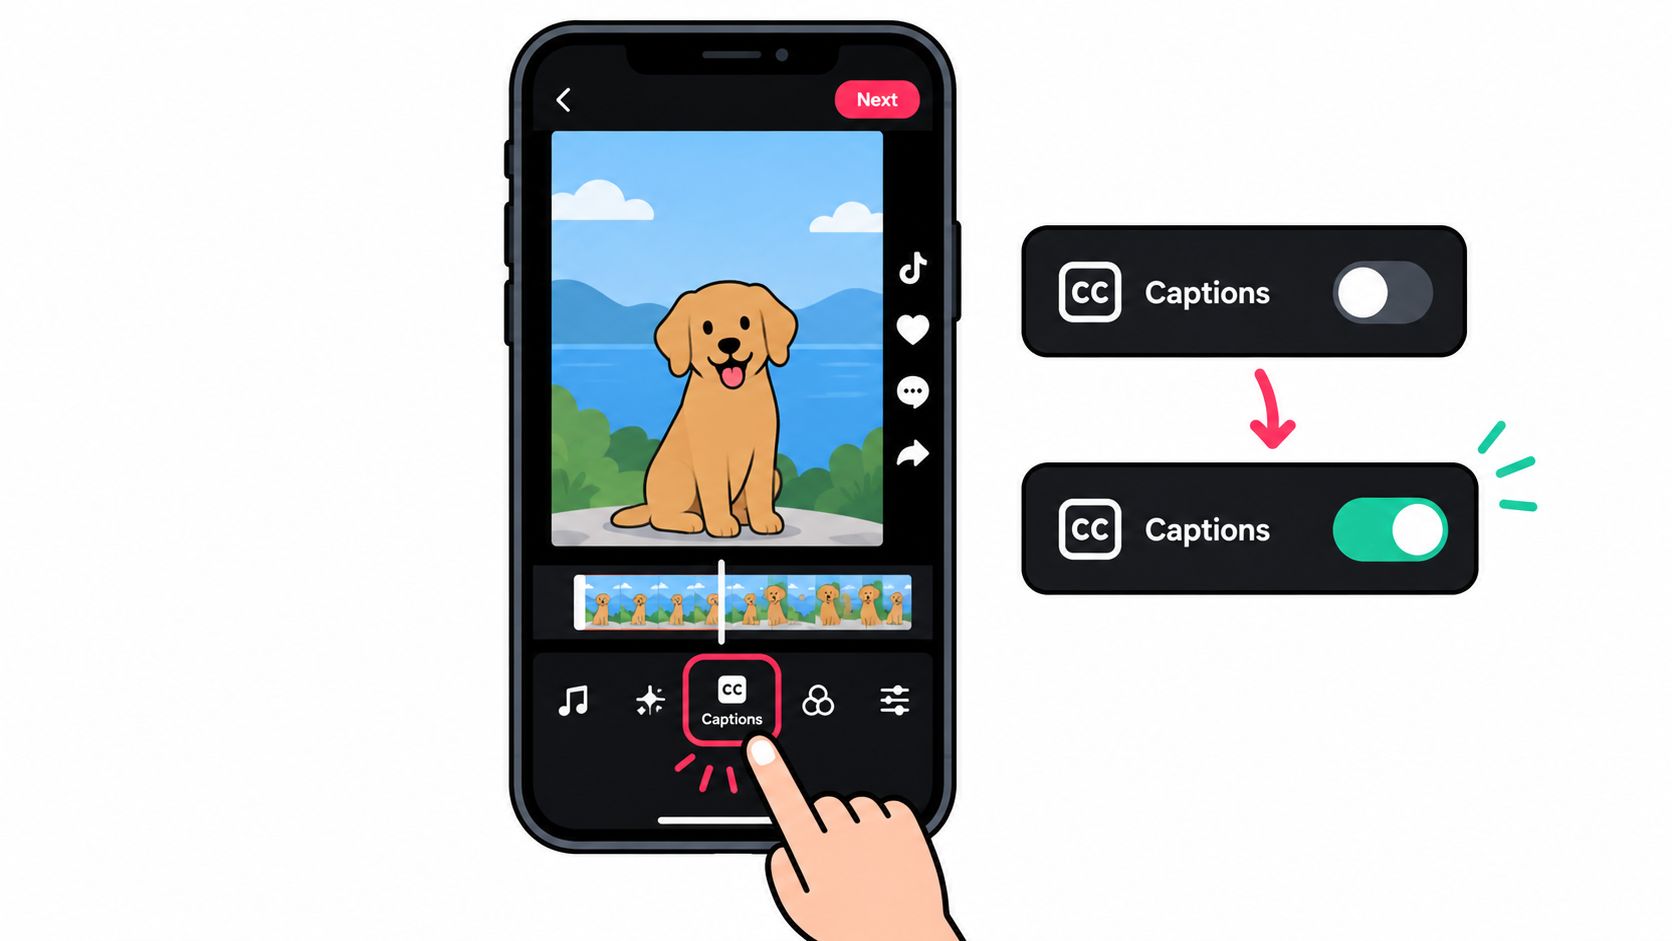
Open the editor with a clip already recorded or uploaded. From there, tap the Captions or Text tool in the right-hand rail, choose Auto Captions, then select Auto-generate from the pop-up. TikTok will ask you to pick the spoken language before you tap Generate.
The processing step usually feels quick, but it isn’t instant. You’ll see a progress indicator while TikTok transcribes the audio, then a caption track appears over the preview in the app’s default white styling at the bottom of the frame. In many cases, it takes roughly half a minute to a minute depending on clip length and server load.
Two limits to check before you trust the toggle
The first limit is rollout. If the feature isn’t available on an account or in a region, the button may not show up. The second is scope. Auto captions apply to the original spoken audio, not to background music, and they won’t magically transcribe every layered sound in the edit.
If you leave the editor before saving, you can lose the caption track. Tap Save before you exit, even if the transcript looks close.
That last step matters because the app treats captions like part of the editable project, not like a permanent baked-in file until you commit it. I’ve seen editors rush past the last screen because the transcript looked decent enough, then lose the whole pass and have to regenerate it. Save first, publish later.
Where Auto Captions Still Get Things Wrong
Auto captions fail in predictable ways, and once you’ve edited enough clips, the pattern gets obvious. The model is usually fine on clean, simple speech. It starts slipping when the audio gets messy, the words get specialized, or the timing has to keep pace with fast vertical editing.
The four failure modes that show up most often
Phonetic collisions are the easy one to spot. The system picks the wrong word because it sounds right in isolation, so “their,” “there,” and “they’re” can get swapped in ways that only a human notices later. Proper nouns are worse because brand names, usernames, and creator handles often don’t sit in the model’s vocabulary at all. Jargon and slang can be even more fragile, especially in gaming clips, niche brand content, or any video with region-specific speech. Then there’s timing drift, where the words appear a beat too early, too late, or break across lines in a way that feels clumsy to read.
A 2024 ACM study of 300 TikTok videos found at least one captioning error in 19.7% of videos, with errors in 24.0% of disability-related videos and 15.3% of general-audience videos, and the error-containing videos averaged a 7.9% word error rate, ranging from 0.5% to 35.7%. That doesn’t mean every caption track is broken. It does mean the caption layer is never safe to leave untouched when meaning matters. The ACM study is the clearest reminder that a fast auto pass is not the same thing as a publish-ready transcript.
| Common Auto Caption Error Categories and Their Impact | Typical Example | Viewer Impact |
|---|---|---|
| Phonetic collision | “there” instead of “their” | Usually minor unless it changes the point or punchline |
| Proper-noun failure | Brand names, creator handles, product names | Can damage credibility fast and confuse viewers |
| Jargon or slang mismatch | Niche terms, gaming slang, region-specific phrases | Hurts comprehension for the exact audience the clip targets |
| Timing drift | Line appears late, cuts mid-word, lags behind audio | Makes captions feel sloppy and harder to read |
The useful way to think about it is this. A missing filler word doesn’t matter much. A wrong brand name, a misread instruction, or an offensive substitution can wreck trust immediately. Auto captions save time on the easy 80 percent of the transcript, and that’s their real value.
Fixing and Editing Auto Captions the Right Way
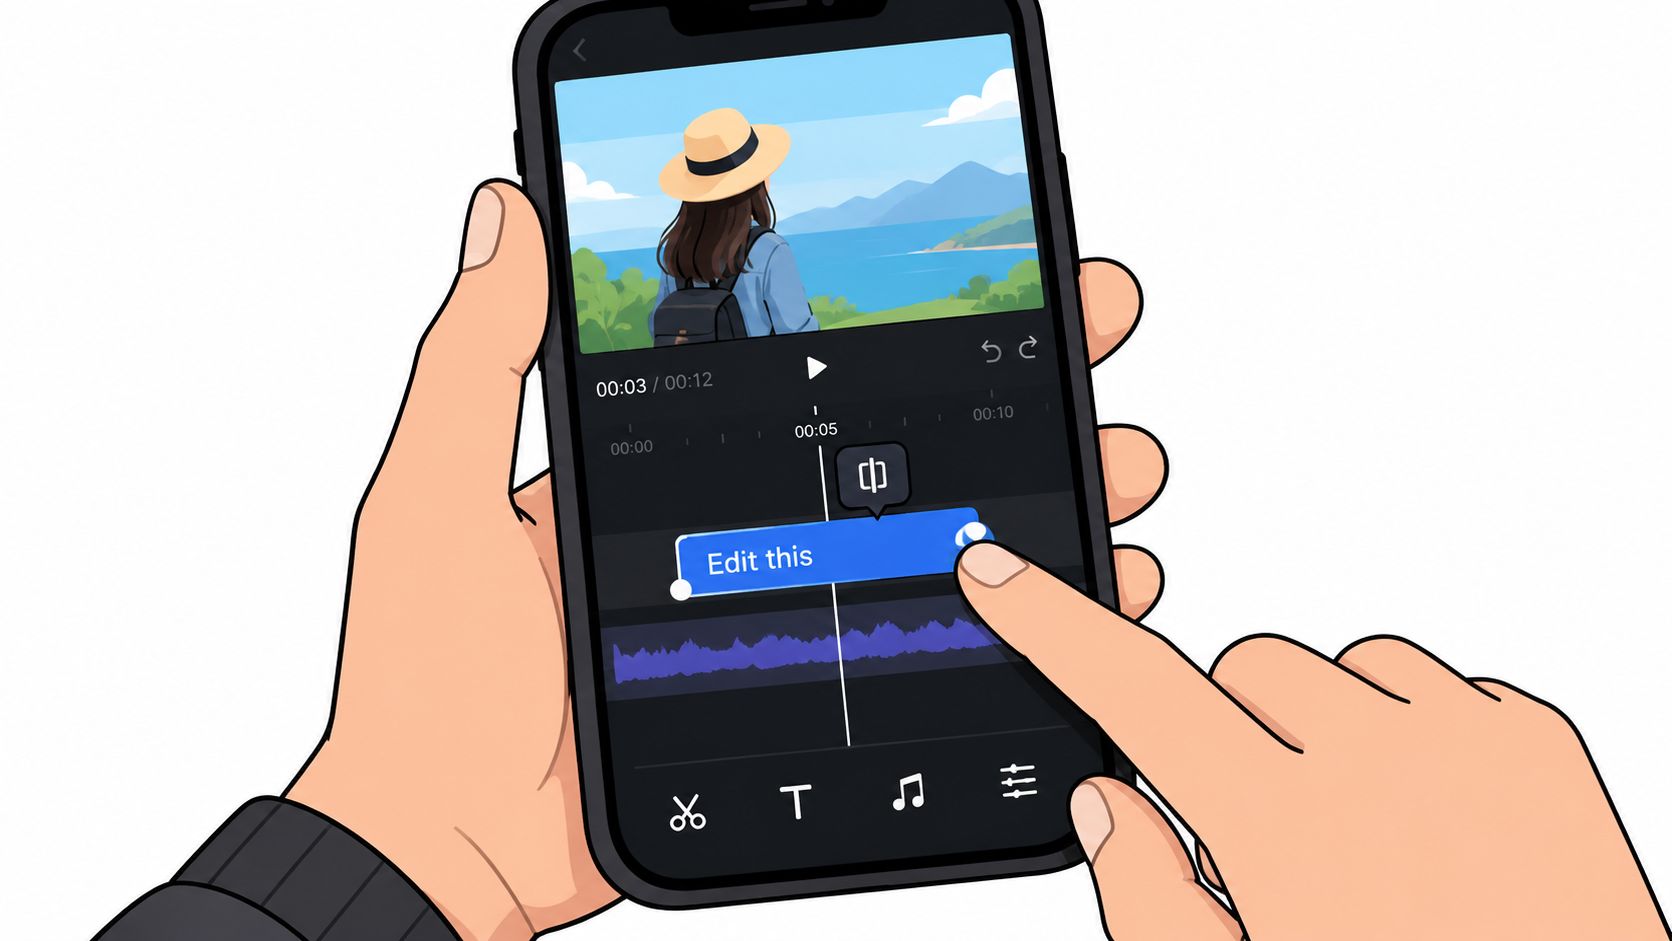
The first correction pass should start as soon as the transcript appears. Stay in the editor while the line breaks and timing are still fresh in your head, because the same problems keep showing up: names, jargon, and captions that lag the audio.
Edit in two passes, not one endless cleanup
The first pass is for meaning. Fix proper nouns, brand terms, acronyms, and any word that would make the clip sound wrong in public. If the caption says the wrong product name, repair that first. If the model mangled slang your audience expects, correct that too.
The second pass is for delivery. Tighten pause timing, split blocks that run too long, and merge segments where the breaks feel awkward. TikTok’s editor is useful because it lets you keep the rhythm while correcting the words. Rewriting every line from scratch throws away the main advantage of auto captions, the timing is already mapped for you.
What to leave alone
Do not over-polish punctuation until the transcript reads like an essay. Captions need spoken cadence, not grammar theater. A comma can help when it marks a pause, but piling on punctuation makes the track feel stiffer than the voice in the clip.
The embedded editor tools make this easier to judge in motion. For a closer look at how rough transcript cleanup fits into the larger edit, ClipOven’s editing guide shows the handoff from transcript to final cut.
Styling Captions for Accessibility or for Retention
Styling starts with a decision. If the clip needs to serve accessibility first, the caption treatment should stay predictable. If the clip is built to hold attention in a busy feed, the styling can do more work, but it still can’t get in the way of readability.
Accessibility-first and retention-first do different jobs
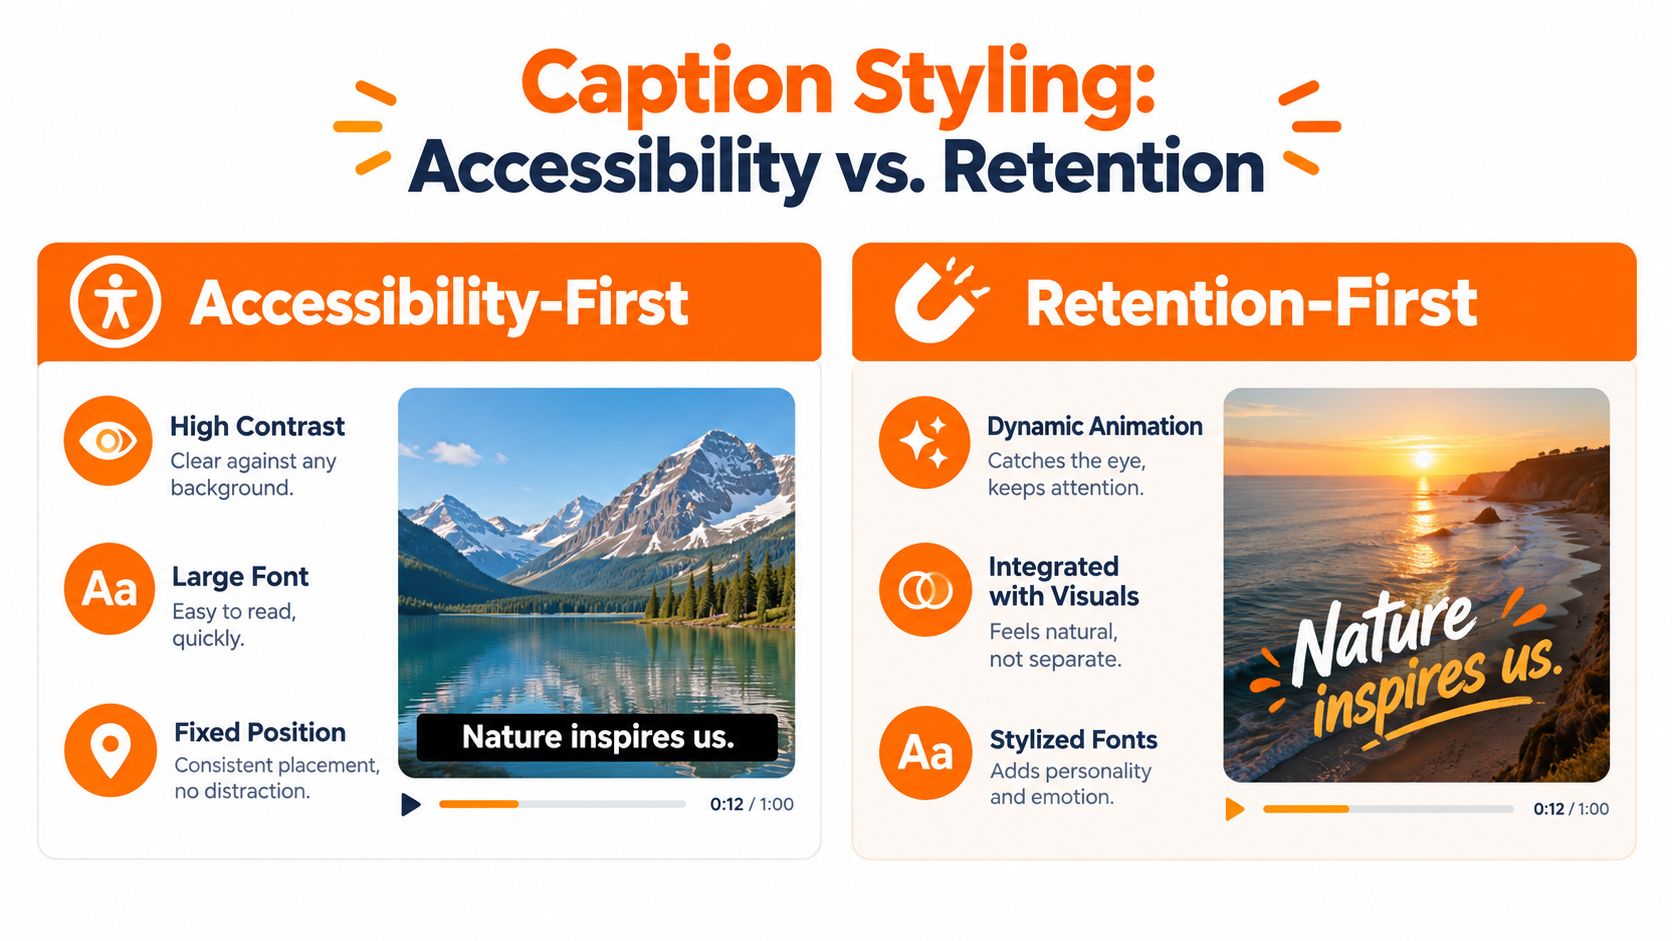
Accessibility-first styling leans on high contrast, larger type, fixed placement in the lower third, and clear speaker attribution when the clip has multiple voices. That’s the version that stays legible on small screens and respects viewers who rely on captions to understand the content. Retention-first styling leans harder into motion and emphasis. It uses punchier line breaks, selective color changes, and typography that helps key words land as the speaker hits them.
The hard part is that more styling is not automatically better. Poorly timed or overly decorative captions can make the frame harder to parse, especially when the text starts competing with the action. The useful middle ground is to preserve accessibility structure, then layer emphasis on top where it helps the hook.
| Accessibility-First | Retention-First |
|---|---|
| High-contrast white text with a clean outline | Strong emphasis on hook words and beat changes |
| Stable lower-third placement | Tighter visual timing that follows the delivery rhythm |
| Larger font for small-screen legibility | More expressive line breaks and motion-aware emphasis |
| Clear speaker cues when needed | Visual energy that supports brand tone |
The right answer depends on the niche. Talking-head business clips usually benefit from the accessibility-first baseline. Storytime, gaming, and punchier creator content can carry more expressive treatment without hurting comprehension.
For a wider workflow view on repurposing vertical edits, the internal process notes in this repurposing guide fit well with caption styling because the caption layer should match the cut, not fight it.
Rule of thumb: If you can’t read the caption comfortably at phone distance, the style is doing too much.
When to Outsource Captions to an AI Editing Workflow
Native auto captions are still the fastest choice for a single TikTok upload, especially when the audio is clean and the creator speaks plainly. They’re already in the app, they’re tied to the edit, and the timing lands close enough for most straightforward clips. That convenience is hard to beat.
The handoff to an external workflow starts making sense when the caption file needs to survive more than one version of the clip. If you’re turning the same source into a vertical TikTok, a square cut, and a widescreen version, the caption layer becomes part of the reuse problem, not just the posting problem. The same is true when the audio includes multilingual code-switching, heavy jargon, or an accent that keeps tripping the transcription layer.
A simple decision split
- Stay native when: the clip is short, the speech is clean, and you only need one publishable TikTok.
- Move external when: the same transcript needs to be reused, re-styled, or batch-processed across formats.
- Audit manually when: brand names, product names, or creator handles would be embarrassing if misread.
- Use a workflow tool when: the volume is high enough that editing every caption in-app is the bottleneck.
That’s where a tool like ClipOven can make sense, because it can assemble cuts, captions, and effects inside one AI-driven workflow instead of forcing every fix back into the mobile editor. It’s not a replacement for judgment, but it is useful when the same caption file has to be styled, timed, and exported across multiple short-form versions. ClipOven’s automated video editor fits that use case better than a one-off caption toggle.
| Factor | TikTok Native Auto Captions | AI Editing Workflow (e.g., ClipOven) |
|---|---|---|
| Speed for one-off posts | Very fast inside the app | Fast, but better when bundled with other edits |
| Multi-format reuse | Limited | Stronger when one transcript needs several exports |
| Caption styling control | Basic compared with full editing tools | More flexible timing and styling control |
| Batch work | Gets tedious quickly | Better suited to repeated production |
| Best fit | Native-English creators posting one clip at a time | Editors handling volume, repurposing, or more complex audio |
A Repeatable Caption Workflow Before You Publish
A good caption pass starts before the transcript exists. Clean audio gives the model fewer chances to guess, so a lapel mic, shotgun mic, or a quieter recording setup makes the first pass easier to trust. Once the clip is trimmed, turn on auto captions before stickers, overlays, or extra text crowd the lower third.
A publish-ready checklist
- Record clean audio first. Keep background noise down and the mic close enough that speech stays direct.
- Generate captions inside the editor. Do it before the rest of the on-screen design starts taking space.
- Fix names and product terms first. These are the errors viewers notice fastest.
- Scan for drift. Long pauses, fast turnarounds, and crosstalk are where timing problems show up.
- Style for the frame. Make sure the font stays readable in 9:16 on a small phone screen.
- Review one last time. Export a frame to your camera roll and check hand placement, lower-third clutter, and line breaks before posting.
The goal is not perfect captions in isolation. It is a caption layer that still reads well in the feed, where the screen is small, attention is thin, and sound is often off. For editors running this workflow across multiple clips, ClipOven’s editing system fits that approval step, because the caption pass stays tied to the final review instead of getting treated as a separate cleanup task.
A caption track that survives the scroll is the one that got checked once for meaning and once for readability.
If you want a faster way to turn rough clips into publish-ready shorts, try ClipOven. It brings cuts, captions, and effects into one AI-driven workflow, which makes the caption layer easier to fix before a TikTok goes live.