 clipoven
You already have the footage. A two-hour stream, a 14-minute tutorial, a webinar with one funny exchange in the middle. You cut out the good 40 seconds, drop it on a vertical timeline, upload, and it lands wrong: black bars top and bottom, the speaker’s chin cropped off, captions sitting under the like button.
The clip isn’t the problem. The conversion was treated as an export instead of an editorial rewrite. Learning how to make a YouTube video a Short comes down to re-deciding three things: what the viewer sees, what they hear first, and what must stay on screen for the moment to make sense without the 20 minutes that used to come before it.
The feed rewards that discipline. The Shorts player passed 6.5 billion daily views globally by March 2021, and the format grew from an India beta to more than 100 countries by July 2021, according to this short-form video research record. The same record puts Shorts past 70 billion daily views by October 2023. Nobody scrolls slowly through that.
Table of Contents
- Shorts Specs to Target Before You Edit
- How to Convert a Horizontal Video Step by Step
- Reframing Sources That Keep the Subject in View
- Check Rights and Originality Before You Publish
- Fix Letterboxing, Hidden Captions and Rejected Uploads
- Choose Manual Editing or an AI Editor for Your Next Short
Shorts Specs to Target Before You Edit
On October 15, 2024, YouTube changed what counts as a Short: new uploads that are square or taller and run up to 3 minutes now fall into the Shorts bucket, per YouTube’s Shorts upload specification. Anything published before that date keeps the rules in effect when it went live, which for most older uploads means the old 60-second ceiling. Check that split before you plan a runtime, because duration and framing get decided together.
| Setting | Target | Why It Matters |
|---|---|---|
| Aspect ratio | 9:16 vertical (square also qualifies) | Shorts classification requires square or taller frames |
| Duration | Up to 3 minutes for uploads after October 15, 2024 | Older uploads follow the 60-second rule |
| Resolution | 1080 x 1920 pixels | The Shorts creation tool accepts a maximum of 1080p |
| Video codec | H.264 | Widely accepted and plays reliably on phones |
| Audio codec | AAC | Standard companion to H.264 for upload |
| Frame rate | Match the source footage | Avoids judder or conversion artifacts |
| Source eligibility | Public videos you uploaded | Private, unlisted and claimed videos are excluded from the native tool |
Two production lanes, not one
The longer ceiling didn’t make every clip longer. It created a choice. Keep the sub-60-second lane for a single punchline, a reaction, or one clean gameplay beat. Use the up-to-three-minute lane when the moment needs setup: an explanation, a highlight sequence, an interview answer that only lands with its context, or a fight you can’t compress.
If the encoder side is where you usually get stuck, this walkthrough of export settings for YouTube Shorts covers the preset details. Before you open a timeline, run three checks:
- Confirm the target length against the upload date rule, not against what you remember.
- Confirm the export preset is 1080 x 1920, not a scaled 16:9 frame with padding.
- Confirm source eligibility for YouTube’s native Edit into a Short tool, which takes public videos you uploaded and excludes private, unlisted, and third-party claimed videos.
How to Convert a Horizontal Video Step by Step
Work in the order an editor works, not the order a menu offers. Each step below exists because skipping it produces a specific, recognizable failure.
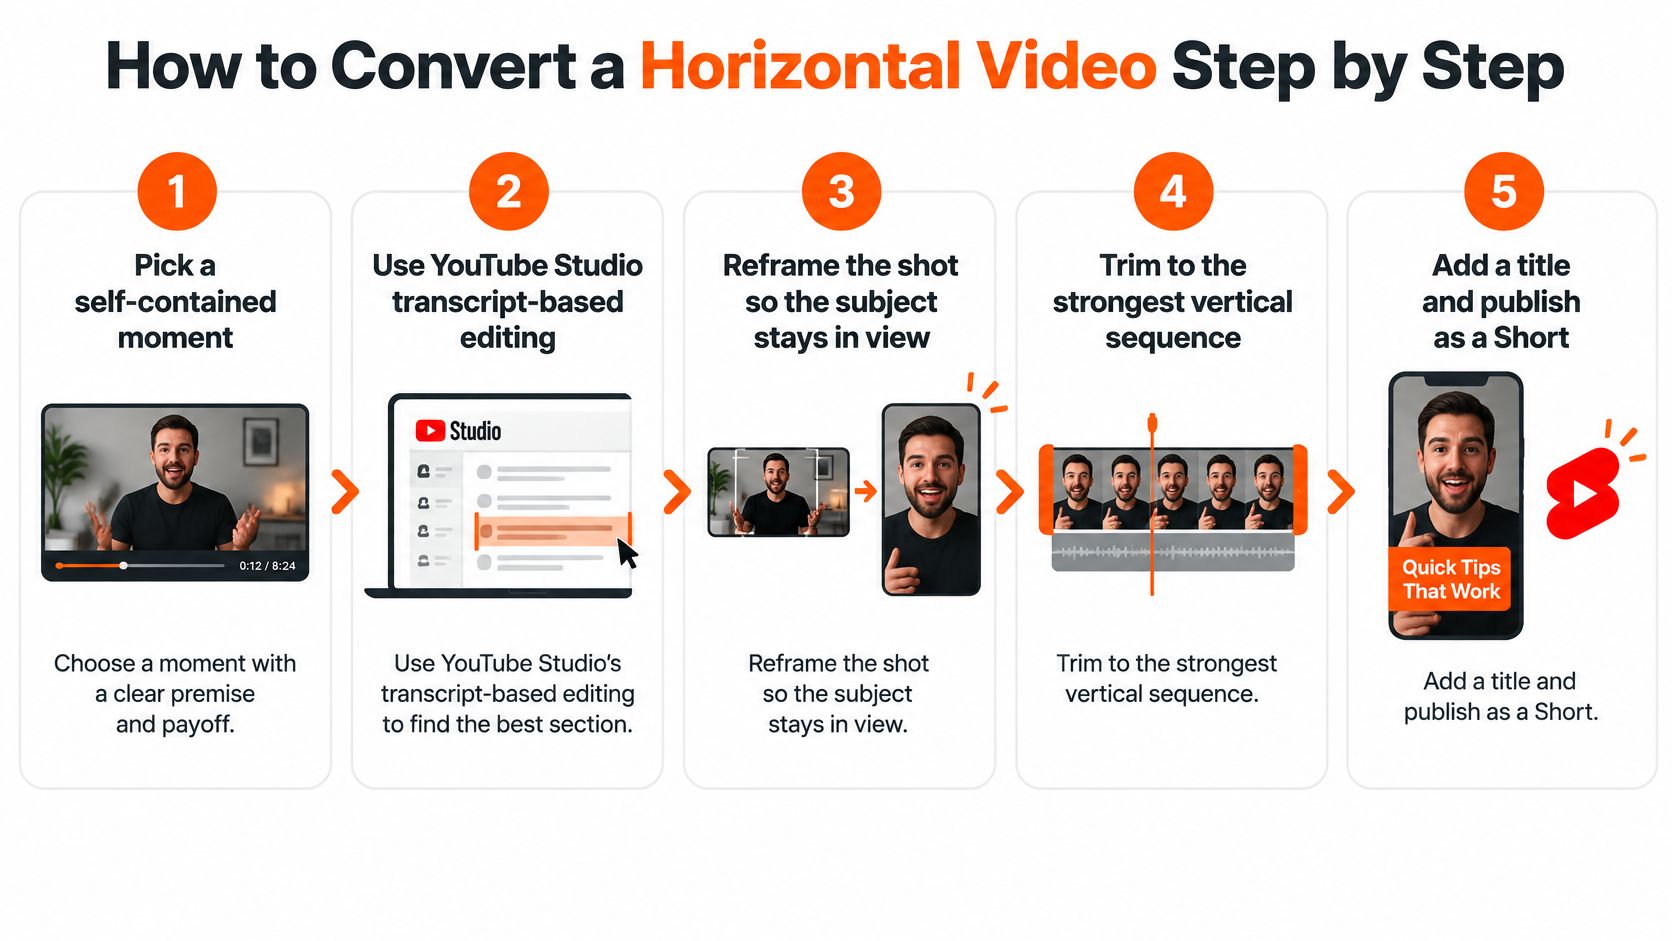
The conversion in eight steps
1. Pick a self-contained moment. It needs a premise, a payoff, or a conclusion the viewer can take away. YouTube Studio lets you select from a transcript or enter timestamps when you build a Short from an existing video, as described in YouTube’s guide to converting an existing video into a Short. A clip that needs the first five minutes to make sense dies in a feed that gives it one second.
2. Trim to the beats that carry the story. Most dead air hides in two places: the half-second before someone starts a sentence, and the gap between a question and its answer. Cut both. Repeated phrases go too, even the ones that sound charming in the long version.
3. Rewrite the opening. Your long-form intro is now the reason people swipe. Start on the strongest line, the reveal, or the question, and let the explanation follow it. If the first frame is a face saying “so basically,” you’ve already lost the scroll.
4. Reframe to 9:16 and step through every cut. Keep the speaker, the gameplay action, or the key visual inside the central safe area. Automatic crops will hide peripheral content you didn’t notice on a 16:9 monitor, so scrub the timeline rather than trusting the preview thumbnail.
5. Burn in captions and lift them off the interface. Watch enough Shorts and you’ll see text sitting exactly where the like, comment, and share buttons land. Move the caption block toward the upper middle of the frame and keep line lengths short enough to read in a glance.
6. Clear the audio before export. Strip or license any music you don’t own, and check that a stream’s background track isn’t baked into the mix. This is cheaper to fix now than after a claim blocks the upload.
7. Export to spec. 1080 x 1920, H.264 video, AAC audio, and the frame rate of your source. Matching the source rate avoids judder on gameplay and conversion artifacts on screen recordings. Then look at the runtime again, because trimming during the reframe often changes it.
8. Preview full screen on a phone. A crop that looks generous on a 27-inch monitor routinely slices a forehead on a 6-inch display. This is the step people skip and then blame the algorithm for.
Practical rule: if the viewer needs something outside the crop to understand the clip, the crop is wrong, not the clip.
A finished Short reads as one idea. Hook in the first second or two, captions legible at arm’s length, subject centered through every cut, nothing load-bearing touching the edges. If you can describe the clip in one sentence without saying “and then,” you’ve got it.
Reframing Sources That Keep the Subject in View
Put a static center crop on a gameplay clip and watch what disappears. The kill feed sits top right, the minimap bottom left, the reaction cam in a corner, and the center of the frame holds a whole lot of wall. The same thing happens in a two-person interview where the person answering is not the person the crop is centered on, and in a slide presentation where the crop lands on empty margin.
Most tutorials stop at “crop the 16:9 video to 9:16.” That advice breaks exactly where creators need it most: gaming streams, interviews, presentations, and conversations where the important action travels across the frame, as YouTube’s guidance on creating Shorts from existing videos implies by designing its workflow around vertical footage shot that way in the first place.
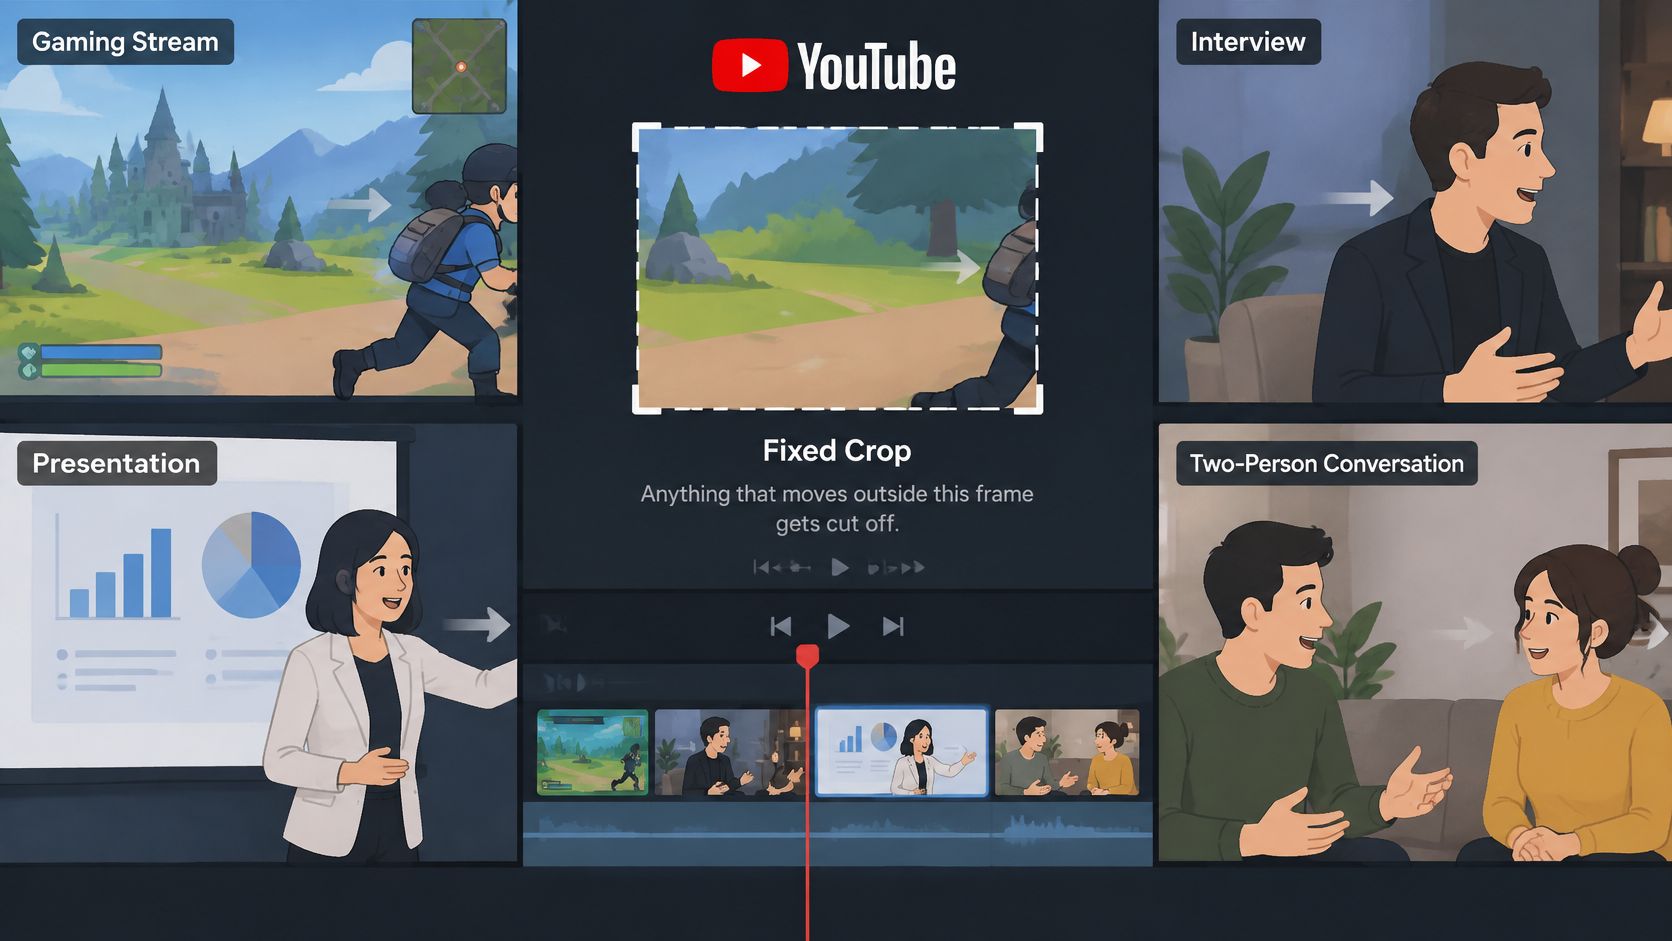
Which crop each source needs
| Source Type | Crop Approach | Watch For |
|---|---|---|
| Solo talking head | Tight 9:16 crop centered on the face | Hands, props or on-screen text at the edges |
| Two-person conversation | Switch the crop to the active speaker on each cut | Reaction shots lost when the crop stays static |
| Interview with B-roll | Wide crop for context shots, tight crop for quotes | Subject drifting out of frame during movement |
| Gameplay with HUD | Keep the action region plus scoreboard or minimap in view | HUD elements cut at the edges |
| Slide presentation | Split layout with slide above and speaker below | Slide text too small to read on a phone |
| Podcast or stream clip | Widest crop that keeps faces and text readable | Visual context lost if the crop is too tight |
The difference between a vertical file and a watchable Short is restructuring, not resizing. A viewer who finds the clip cold has no idea who these people are, what game this is, or why the argument matters. Your first two seconds have to carry that context, which usually means text on screen instead of a spoken setup.
A changing crop beats a clever one. Keyframe the frame position at each cut so it follows the speaker or the action, and accept that the move will be visible. A hard cut to the new framing reads as intentional editing. A slow drift reads as a mistake.
Decide what the viewer must see to understand the moment, then choose the crop that keeps that element on screen for the entire clip.
For a fuller comparison of manual and automated approaches to the same problem, this guide to converting horizontal video to vertical breaks down the trade-offs by source type. The rule holds either way: the crop serves comprehension, not symmetry.
Check Rights and Originality Before You Publish
Captions, a punch-in zoom, a whoosh, and a jump cut do not make a clip original. That’s polish, and YouTube evaluates the substance underneath it. The assumption worth questioning is that heavy editing converts borrowed footage into your content. Sometimes it does, and sometimes it just makes a copyright problem faster.
Two separate tests apply. Copyright is about permission to use the material at all. Monetization is about whether the result counts as your own work. YouTube treats unedited clips from films or television, reuploads from another platform, and compilations without original content as non-original, and those are ineligible for Shorts revenue sharing, according to YouTube’s monetization policy for Shorts. The broader reused-content rule allows borrowed material only when the new video adds significant original commentary, substantive modification, or educational or entertainment value, and copyright rules can still bite separately.
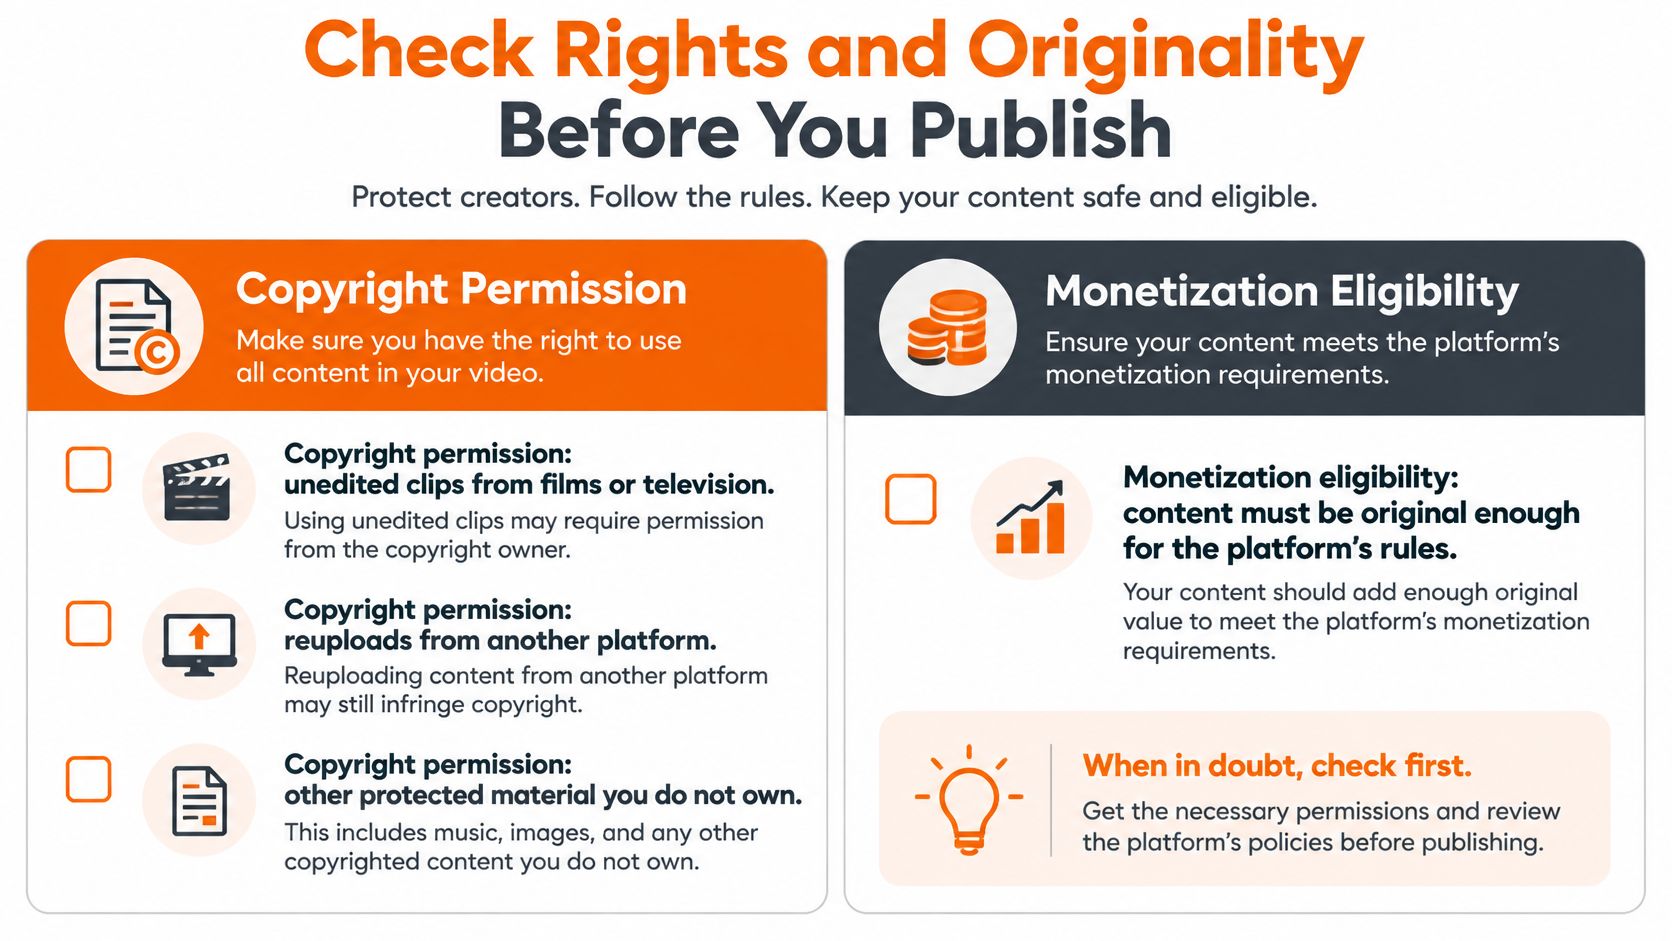
In 2025 YouTube renamed “repetitious content” to “inauthentic content” while stating that the reused-content rules still apply, which is a strong hint that volume alone won’t carry a channel. The practical questions creators ask are harder than the policy language: how much commentary is enough, does a face-cam reaction change the analysis, and how do you document permission for someone else’s stream? The current guidance on YouTube’s original content update for Shorts is worth reading before you build a channel on reaction edits.
The pre-edit checklist
- Own the footage or hold written permission. A DM saying “sure, clip my stream” is weak. Get an email or a contract clause that names the platform and the format.
- Name your original contribution in one sentence. If you can’t, the edit still needs more original contribution, no matter how many sound effects sit on it.
- Clear the audio separately from the video. Music rights and footage rights are different permissions with different owners.
- Check for existing claims before you publish. A claimed source can’t go through YouTube’s native Shorts tool, and a claim on the export blocks or monetizes the upload on its own terms.
Fix Letterboxing, Hidden Captions and Rejected Uploads
Most first attempts fail in the same handful of ways. Each has one fix, and none of them require starting the project over.
- Letterboxing. Black bars top and bottom mean you exported a 16:9 file into a vertical frame. Reframe the source and re-export at 1080 x 1920. Scaling a horizontal clip to fit is not the same as converting it.
- Captions under the buttons. Shift the caption block upward and re-render. Test with the interface visible, not in a clean preview window.
- Soft footage from a low-resolution source. Export at the source frame rate and avoid stacking two upscales. If the original is 720p, sharpening it twice won’t make it 1080p, it’ll make it crunchy.
- Duration confusion. A clip published before YouTube changed the Shorts definition stays classified under the rules in effect at the time. Check the upload date and the runtime before assuming the longer allowance applies.
- The native tool won’t offer the video. Private, unlisted, and third-party claimed videos are excluded from Edit into a Short. Change the visibility or export manually.
- Audio drift after a speed change. Re-export with the audio conformed to the new timeline instead of nudging it back by hand.
- Upload blocked by a claim. Remove or replace the flagged audio and republish. Arguing with the claim in the upload flow wastes an afternoon.
The habit that prevents most of these: run the phone preview after every export, not once at the end of the project.
A vertical file that looks fine in QuickTime can still fail on a phone because the failure is about where the interface sits, not where the pixels sit. Preview inside the app when you can. You’ll catch the caption collision and the cropped scoreboard in ten seconds.
Choose Manual Editing or an AI Editor for Your Next Short
Two numbers decide this: clips per month and how much the crop has to move.
Pick by volume and control
Under about four Shorts a month, with frame-accurate needs, stay manual. Use Edit into a Short in YouTube Studio on a public video you uploaded, pull the moment from the transcript or by timestamp, set the 9:16 frame, then finish in a desktop editor when Studio’s output cap or a moving subject needs finer keyframing.
At eight or more clips a month, with roughly 20 minutes or less per clip and settings a teammate has to reuse, an assisted lane pays for itself. ClipOven is one option: you bring the horizontal footage and tell Eddie what you have in mind, and Eddie returns a 9:16 cut with the subject in focus and captions sized for the feed. From there you can keep chatting to refine the clip or open the full editor to adjust cuts, timing, captions, and effects yourself.
Manual wins when the action crosses the frame and the crop needs keyframes. Assisted wins when the source is a stable talking head and the bottleneck is throughput rather than precision.
Volume is the right instinct, since videos shorter than one minute accounted for 70% of YouTube views in 2024, per Tubular Labs’ platform analysis reported by TVREV. Just don’t let volume decide the crop for you. Pick a lane, finish the clip, and upload only after the spec check, the rights check, and the phone preview have all passed.
You’ve got the footage, the moment, and now the workflow. ClipOven takes a horizontal file and returns a 9:16 Short with the subject framed and captions that survive the interface, then hands you a full editor for the cuts the automation can’t judge. Bring one of your long videos to clipoven and see how far the first pass gets you before you touch a keyframe.