 clipoven
You’ve got a clean horizontal clip, a strong moment near the middle, and nowhere useful to post it. The speaker sits off center, the game interface runs along the edges, and a quick center crop cuts out exactly what matters. That’s the main problem with How to Reformat a Video File. You’re not just changing 16:9 to 9:16. You’re deciding what survives, keeping text readable, and encoding the result so it uploads without drama. Work in that order and the job gets much simpler.
Table of Contents
- Set the Target Specs Before You Edit
- How Much of the Frame Survives the Crop
- Pick a Desktop or Online Tool for the Job
- Reframe Subjects and Protect the Action
- How to Reformat a Video File Step by Step
- Export Settings That Keep Quality and Compatibility
- Confirm the Export Before You Upload
Set the Target Specs Before You Edit
Start with the destination row, then work backward to the crop and tool. Picking settings first prevents the common loop of exporting, discovering the frame is wrong, and starting again.
| Destination | Aspect ratio | Resolution | Container and codec |
|---|---|---|---|
| YouTube Shorts | 9:16 | 1080 × 1920 | MP4, H.264, AAC |
| TikTok | 9:16 | 1080 × 1920 | MP4, H.264, AAC |
| Instagram Reels | 9:16 | 1080 × 1920 | MP4, H.264, AAC |
| Square feed post | 1:1 | 1080 × 1080 | MP4, H.264, AAC |
| Standard YouTube | 16:9 | 1920 × 1080 | MP4, H.264, AAC |
Which Row Should You Use
For most short-form work, choose 1080 × 1920. It fills a phone screen and gives captions enough room to stay legible. Square suits a feed post where you want more horizontal context than a vertical crop allows. Keep standard YouTube footage at 1920 × 1080 instead of forcing every project through a vertical template.
Don’t export a Short at 2K expecting extra quality. The larger file takes longer to upload and process, while the platform still presents it within its Shorts limits. Spend that effort on a cleaner crop and sensible bitrate instead.
Practical rule. Destination first, crop second, codec third. If you reverse that order, you’ll usually redo the edit.
Three Checks Before Opening an Editor
- Destination: Where will this exact file post, and is it the master or a platform copy?
- Source resolution: Is the original high enough for the crop you plan?
- Container: Will the destination accept the MP4 file you intend to export?
Frame rate deserves the same early decision. If you’re unsure whether to preserve or change it, review the trade offs in this guide to changing a video frame rate before you build the timeline. Once those answers are written down, you’ve got a spec sheet instead of a moving target.
How Much of the Frame Survives the Crop
The math is blunt. Converting 16:9 footage to 9:16 while holding height constant preserves roughly 31.6% of the original frame width, according to the Clip Short guide to YouTube Shorts video size. From a 1920 × 1080 source, that’s a window about 607 pixels wide. Everything outside it must be cropped away, placed over a blurred fill, rebuilt in panels, or followed with a moving crop.
| Output frame | Aspect ratio | Pixels per frame |
|---|---|---|
| 1080 × 1920 vertical | 9:16 | 2,073,600 |
| 1080 × 1080 square | 1:1 | 1,166,400 |
| 1920 × 1080 original | 16:9 | 2,073,600 |
Where a Center Crop Loses the Story
Two people seated side by side rarely both fit in that central strip. One face gets clipped, or both end up squeezed at opposite edges with dead space between them. A facecam parked in a corner of gameplay is even easier to lose.
Screen recordings create a different failure. The sidebar, cursor target, or menu you’re narrating may sit well outside the crop. A presenter who walks across the frame causes the same problem over time, even if the opening frame looks perfect.
Test Three Frames Before Committing
Scrub to the start, middle, and end of the clip. At each point, check the subject’s eyes, any product or gesture, on-screen text, and the action the audio refers to. If one position only works for the first frame, the crop doesn’t work.
An exported MP4 with vertical dimensions isn’t finished. A readable composition with the subject protected and room left for captions is finished.
I would treat that three-frame test as non negotiable. It takes under a minute and reveals whether you need a simple crop, a tracked crop, or a completely different layout before you’ve wasted time styling captions.
Pick a Desktop or Online Tool for the Job
Choose the tool for the kind of control the footage needs, not because it promises a one-click result. A static talking head and a fast gameplay sequence are different jobs.
| Tool | Type | Best for | Watch for |
|---|---|---|---|
| DaVinci Resolve | Desktop, free tier | Timeline reframing with keyframes and full control | Steeper learning curve and heavier system needs |
| HandBrake | Desktop, free | Transcoding and cropping one file to a chosen codec | Manual crop only, with no subject tracking |
| FFmpeg | Command line, free | Scripted crops and exact codec flags for batch work | A typo can silently change the output |
| Online converters | Browser | Quick one-off format changes | Upload limits, privacy terms and limited crop control |
| ClipOven | Online AI editor | Subject-aware 9:16 reframing with captions in one pass | Review the output before posting, as with any automated edit |
When Each Option Is the Wrong Choice
DaVinci Resolve is excessive when you only need to convert one stable clip, but it’s the right call when every shot needs its own keyframed position. HandBrake is wrong when the subject moves, since its fixed crop can’t follow action. It’s excellent for a locked-off recording where one window holds throughout.
FFmpeg is the wrong choice if you’ll never reuse the command. Testing the syntax can take longer than using a visual editor. For a folder of similar files, however, a tested command is faster and more consistent than repeating mouse clicks.
Browser converters suit a quick container change on non sensitive footage. Don’t send unreleased client work or identifiable private recordings anywhere until you’ve read the retention and privacy terms. Also inspect the result closely, because a browser tool may compress more aggressively than its settings imply.
The tool matters less than whether it lets you preview the crop, control the encode, and correct mistakes shot by shot. If you can’t do those three things, choose something else.
Reframe Subjects and Protect the Action
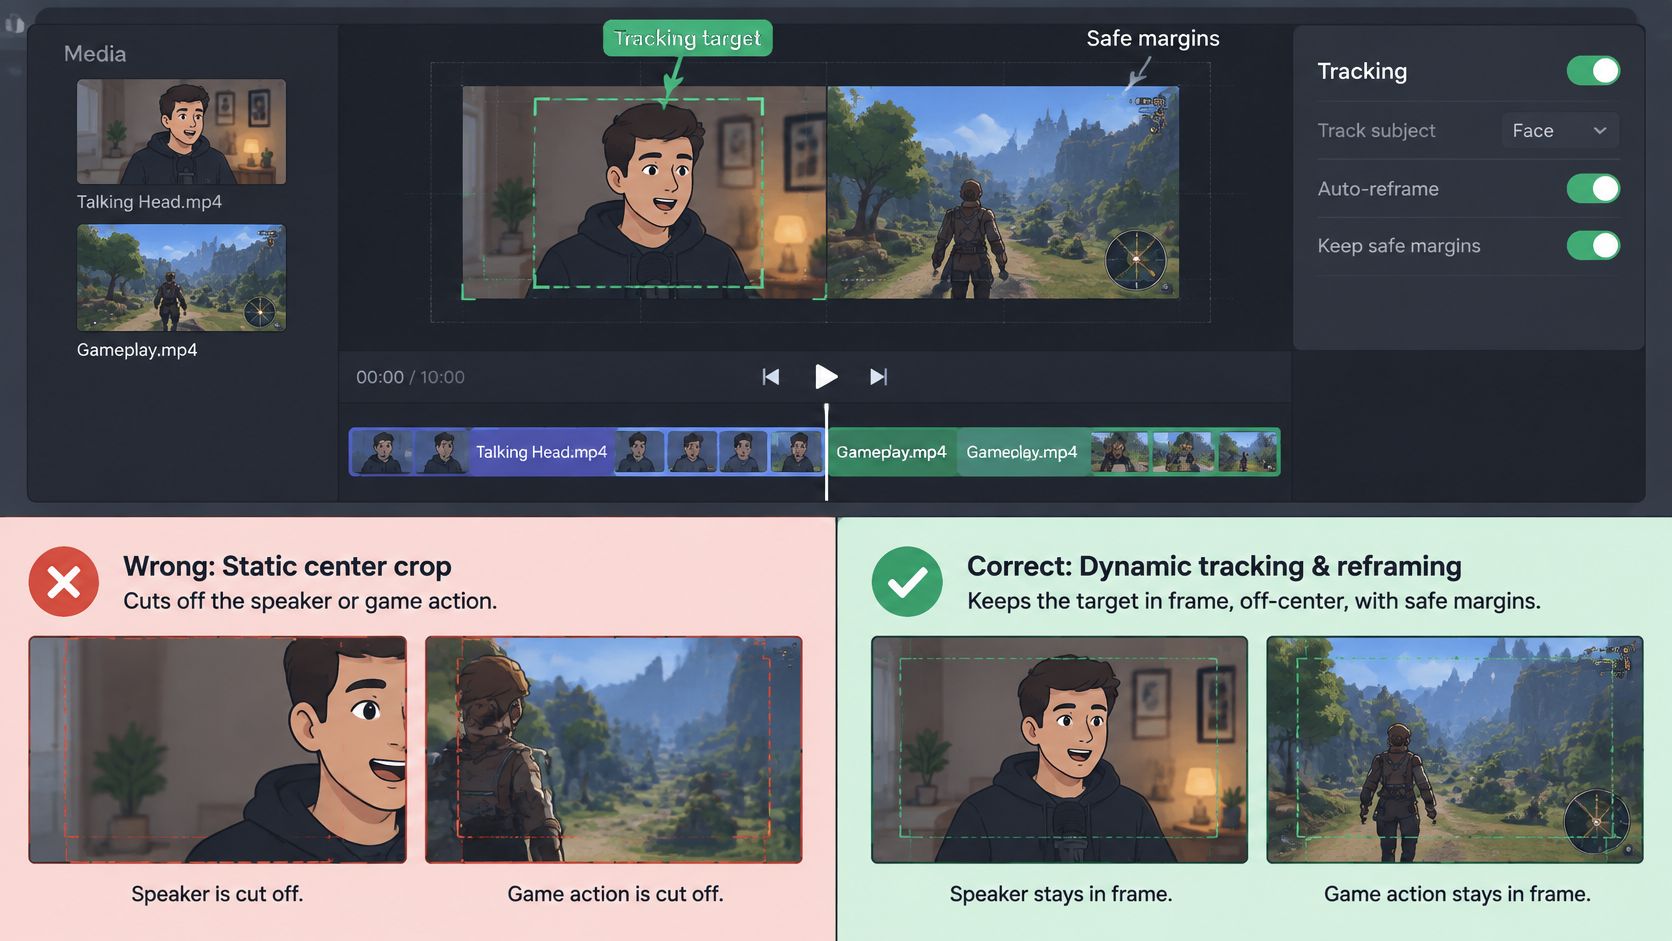
A center crop is the wrong default for most talking-head and gaming footage. It assumes the subject starts in the middle and stays there, which real footage often doesn’t. The Sprout Social guide to social media video specs supports the familiar 1080×1920 vertical export for feeds including TikTok and YouTube Shorts, but dimensions alone don’t tell you how to preserve a moving speaker, HUD, or split-screen layout.
This interface example shows the tracking idea clearly, with the crop following the subject instead of pinning the window to the center.
Match the Layout to the Shot
- One moving speaker: Use dynamic tracking and smooth sudden jumps so the frame doesn’t lurch.
- Two people or facecam plus gameplay: Use a stacked two-panel layout rather than squeezing both into one narrow crop.
- Dense screen recording: Keep the full frame over a blurred background if menus and text must remain readable.
- Subject leaves the window: Make a hard cut to a new crop instead of dragging the frame across empty space.
Failure Points and Manual Overrides
Watch the edges for chat, scoreboards, health bars, subtitles, and product labels. If interface text becomes too small at phone size, don’t crop tighter. Switch to padding or a panel layout for that shot. The broader resizing choices are covered in practical terms in this walkthrough on how to resize videos, especially when you’re weighing crop against fill.
Override the tracker when it jumps between speakers, misses a gesture, or follows the wrong player during overlapping action. Decide the framing at cut level, not once for the whole clip. A new shot deserves a fresh decision.
The short demonstration below is useful for seeing how reframing choices change what the viewer notices first.
Finally, watch the result with sound off. If you can’t tell who matters or where the action is, the composition isn’t clear enough yet.
How to Reformat a Video File Step by Step
Use this sequence for a horizontal source going vertical. The same logic applies to square output, but check the crop against the intended frame rather than reusing vertical positions.
Build the Vertical Version
-
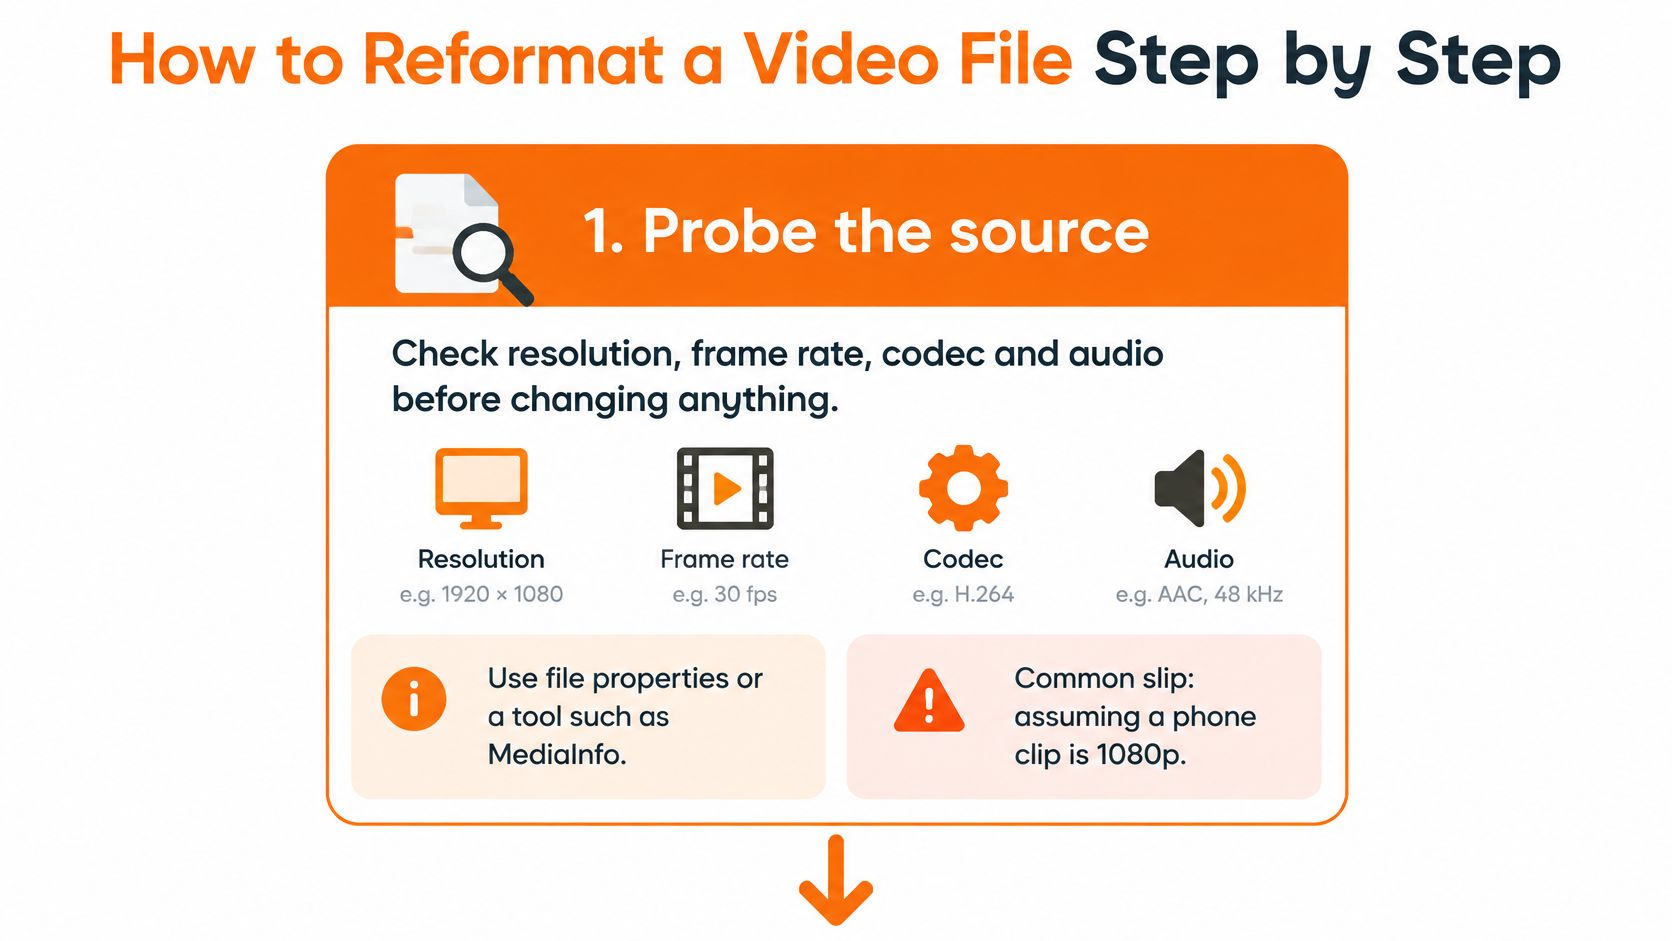
Probe the source. Check resolution, frame rate, codec, and audio in file properties or MediaInfo before changing anything. Don’t assume a phone clip is 1080p, because the workable crop changes if the source is larger or smaller than expected.
-
Set the target. Create the project at 1080 × 1920 for vertical short-form output and keep the source frame rate unless there’s a specific reason to alter it. Setting the project correctly at the start prevents accidental bars and stretched frames later.
-
Place the crop or reframe. For a 1920 × 1080 source at full height, your vertical window is about 607 pixels wide. Move it onto the active subject or enable tracking, then preview the opening, midpoint, and a late shot. A crop that only suits the first frame needs keyframes, tracking, panels, or padding.
-
Scale the selected region. Scale the crop to the exact 1080 × 1920 canvas without stretching either axis. If the image turns soft, the source region may be too small. Use a wider layout instead of sharpening a weak crop into something harsh.
-
Add captions and overlays. Place text inside the safe area, away from the bottom controls and the right-side buttons. Keep titles clear of faces and important interface elements. Check one frame at actual phone size, not just on a large monitor.
-
Set the delivery format. Choose MP4 with H.264 video and AAC audio, then apply the bitrate and frame-rate choices that suit the footage. Save these as a preset if you’ll process similar clips again.
-
Export and inspect elsewhere. Play the finished file in a second player, outside the editor. Confirm the crop holds at every cut, the timing feels natural, and audio stays in sync through the final second.
Don’t judge the export inside the editing timeline. The standalone file is the thing viewers and platforms receive.
A good result has no unintended black bars, no distorted faces, and no captions covering the action. The subject should read immediately in the vertical frame, and the first spoken word should land with the matching mouth movement. If you’d hesitate to post the standalone file, fix it now rather than hoping the platform preview hides the problem.
Export Settings That Keep Quality and Compatibility
Start with MP4, H.264 video, and AAC audio. That combination is identified as a common delivery setup in the Slice Media social video specifications for 2026, which also notes that doubling frame rate from 30 to 60 frames per second approximately doubles the number of encoded frames. Other accepted containers exist, but an unusual choice gives you one more compatibility variable to troubleshoot.
| Setting | Starting value | Effect on the file |
|---|---|---|
| Frame rate | Match the source, commonly 30 fps | 60 fps roughly doubles encoded frames and file size |
| Video bitrate | 10 to 16 Mbps for detailed 1080 × 1920 footage | Higher bitrate keeps more detail but raises file size and upload time |
| Audio bitrate | 192 kbps | Keeps speech intelligible in short clips |
| Audio sample rate | Match the source | Avoids drift and sync errors |
What Happens During the Encode
The software decodes the source, crops or resizes every frame, encodes a new video stream, and multiplexes the audio into the container. Sharpness, motion smoothness, and synchronization can all change even when duration doesn’t. That’s why a visually correct crop can still produce a bad upload.
Use the lower end of the bitrate range for a mostly static talking head. Move higher for gameplay, confetti, foliage, fast pans, or fine interface detail. Chasing spotless quality with an enormous bitrate usually wastes upload time, since the platform will encode its own playback versions anyway.
For setting combinations aimed specifically at Shorts, compare your preset against these export settings for YouTube Shorts and then encode a short test from the busiest part of the clip. Quiet opening frames hide compression problems that fast action exposes.
Two Rules That Prevent Rework
Encode once from the highest-quality source you have. Repeated transcoding throws away detail each time. If only the container needs changing and the existing video and audio codecs already suit the destination, remux by copying the streams instead of re-encoding. It’s faster and preserves quality, but it can’t fix an incompatible codec or a wrong crop.
Confirm the Export Before You Upload
Captions aren’t decoration. They’re part of whether the reformatted clip communicates at all. Current coverage summarized by VoxBooster’s short-form caption usage statistics says up to 69% of consumers prefer sound-off viewing in public, while 63% of deaf and hard-of-hearing respondents expect subtitles to be nearly perfect.
The export interface below shows why caption placement deserves its own check instead of being approved from the timeline preview.
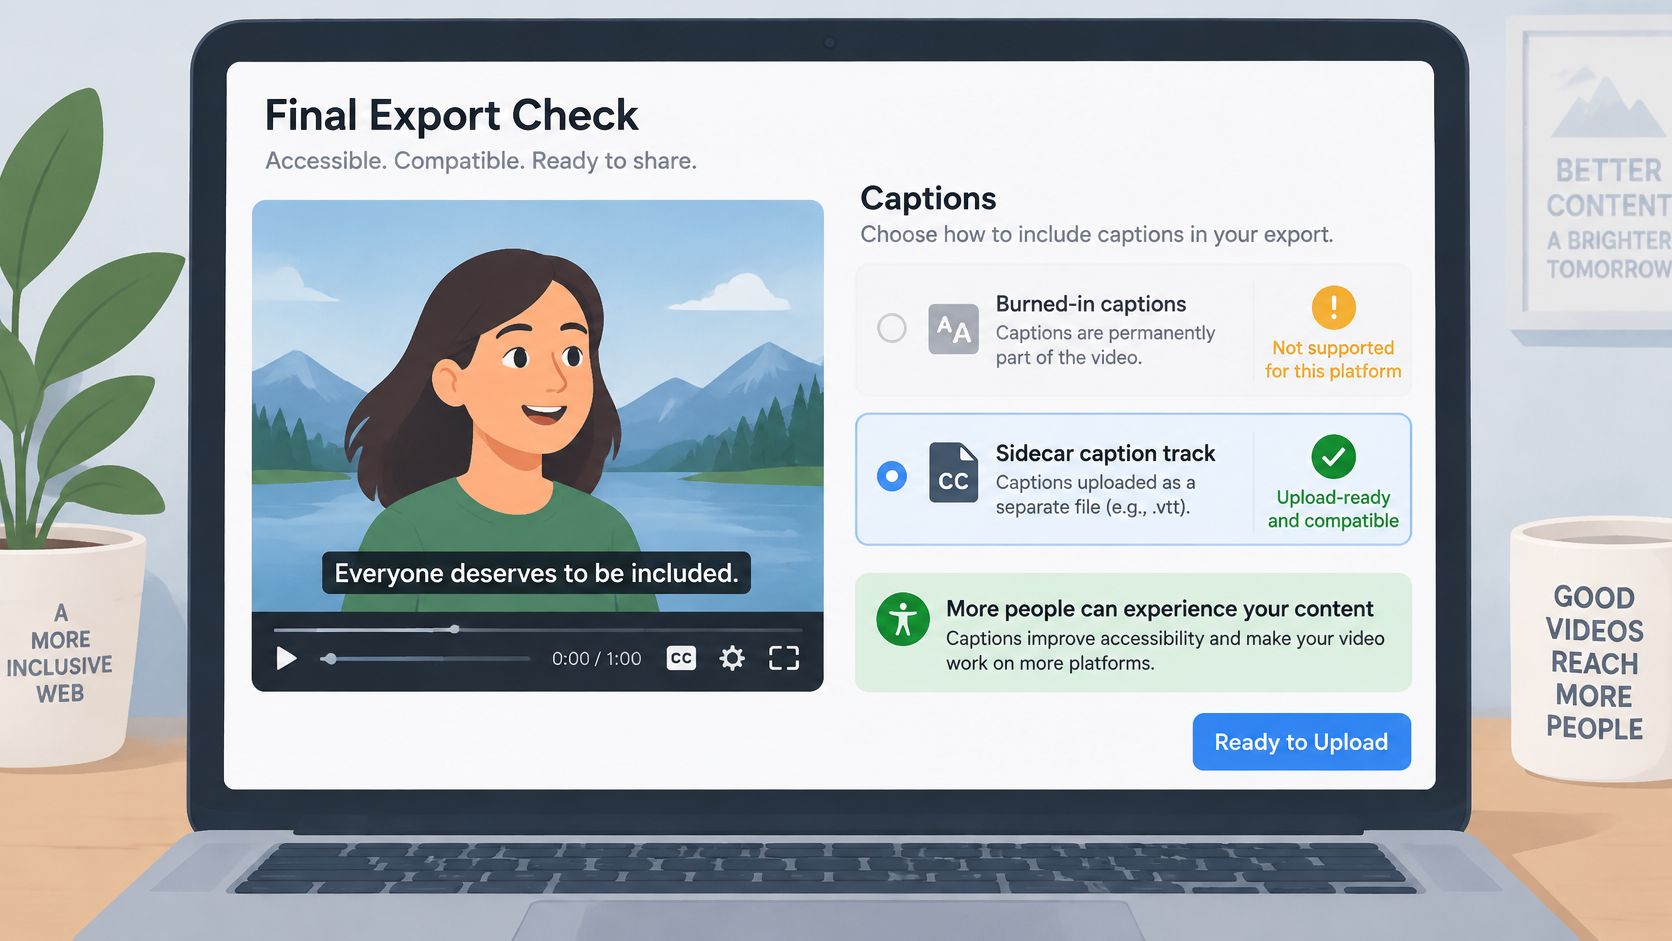
Burned-In or Sidecar Captions
Burned-in captions always appear and keep your styling intact, but viewers can’t turn them off and you can’t correct a word without exporting again. A sidecar track stays editable and gives viewers control, although support isn’t consistent in every posting workflow. For a feed-first vertical master, I would usually burn in the styled captions and retain the text separately for corrections or localization.
Check names, gaming terms, accents, code-switching, special characters, and non-Latin scripts in the exported file. Automated captions can change meaning with one wrong proper noun. Also identify speakers and meaningful non-speech cues when they’re needed to follow the clip.
Final Upload Checklist
- Play at phone size: Confirm faces, interface text, and captions remain readable.
- Check safe zones: Keep captions above bottom controls and clear of right-side buttons.
- Follow jump cuts: Make sure speed changes and edits still line up with speech.
- Check the last second: Confirm frame rate, ending frame, and audio sync.
- Upload privately first: Review the platform-processed version before publishing.
The failure that most often forces a re-export is captions sitting over the subject’s face. Run the full checklist on one representative clip before reformatting a batch. If you’d rather handle reformatting and captions together, bring your footage and tell Eddie what you have in mind. Eddie turns horizontal footage into a 9:16 vertical clip with the subject in focus and captions that fit the feed, then you can open the full editor for precise adjustments.
Bring one horizontal clip to clipoven, tell Eddie the kind of vertical short you want, and review the reframed cut with captions already fitted to the feed. Keep chatting to refine it or open the full editor to adjust cuts, timing, captions, and effects yourself before exporting.